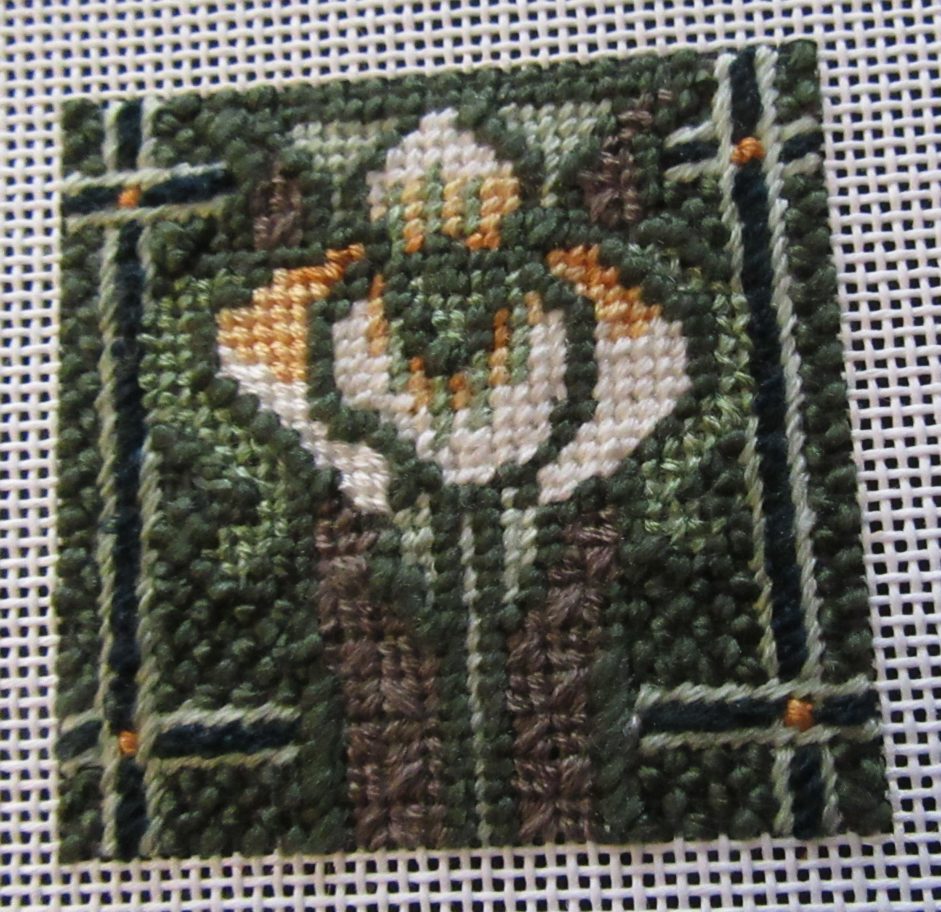
This project is a celebration of green with many shades and using five different green threads. A nice touch is the border. The three lines in the border are treated as if they were a ribbon and are stitched with a woven look. It’s a project where the simple stitches let the different colors of green shine.
While the finished piece looks symmetrical, you’ll find when you stitch it that it is not. Follow the painting on the canvas, not what you think should be there.
Materials
- Mindy mini needlepoint canvas 12R
- 1 skein each Dinky Dyes silk floss:184 Wild Honey (light gold), 113 Cobar (dark gold) (stash threads can be substituted)
- 1 package Wool Crepe WC600 Deep Forest (dark green)
- 1 skein Silk ‘n Colors SNC000 Snow Drift White (white)
- 1 skein Treenway Silks Harmony silk floss 1005 (dark olive)
- 1 skein Planet Earth Silk 177 Thyme (dark green)
- 1 skein Baroque Silk 1302 Guacamole (green)
- 1 skein Classic Colorwqorks cotton floss Wasabi (light green)
Stitches
Stitch the flower, except the petal on the left side, in Continental using four strands of the white and both gold stranded silks. Do not shade the flower.
Stitch the left petal in Reverse Continental using the same threads.
Continental is used here because the threads are hand-dyed and have some variation in color. If you are using stash threads that are solid, these areas can be stitched in Basketweave and Reverse Basketweave.
Stitch the light green areas near the flower in Tent using four strands of light green Classic Colorworks Floss. Stitch the vertical lines on the flower in the same stitch using one strand of green Baroque Silk.
Stitch the side leaves and the center green area in Four-way Continental, below, using one strand of green Baroque Silk.

Stitch the brownish green areas in Tent-Mosaic Check, below, using four strands of Harmony silk floss.

Typical of many Art Nouveau Tiles, this design has an outline. On tiles these would be raised lines of clay that kept the glazes for different parts from mixing together. The lines would also be glazed in the background color. It’s similar to the method used to make cloisonne jewelry. Designers in this period took a necessity and turned it into a design element. We’ll do the same in our needlepoint.
The outline is stitched in Tent, Tent for Letters, and Diagonal Gobelin, below, using dark green Planet Earth Silk. Tent for Letters, below top, is used wherever the outline slants from lower right to upper left to ensure the lines will look solid. Diagonal Gobelin, below bottom, is used only on either side of the bottom olive section and only until the areass widen (see model picture).

Complete the outline before stitching the background or borders.
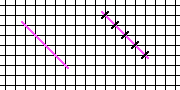
The borders are mostly stitched with parallel lines of Oblique Gobelin, below, using light green floss and dark green Wool Crepe. The three lines are treated as one unit and are woven so at each intersection the ribbon goes over one and under the next.

Stitch the outside lines first to establish the woven pattern. Once this is complete, stitch the middle dark green line. When you do this, remember to skip over the gold intersections at each crossing. Add these in Needlepoint Cross Stitch, below, using four strands of dark gold floss.

Finish by stitching the remaining background in below, using dark green Planet Earth Silk.


About Janet M Perry
Janet Perry is the Internet's leading authority on needlepoint. She designs, teaches and writes, getting raves from her fans for her innovative techniques, extensive knowledge and generous teaching style. A leading writer of stitch guides, she blogs here and lives on an island in the northeast corner of the SF Bay with her family
Too bad it is so dark when you see online. Although it is probably great in person.
It’s dark like that in real life too. I had to stitch the background outside in daylight.
Keep stitching,
Janet