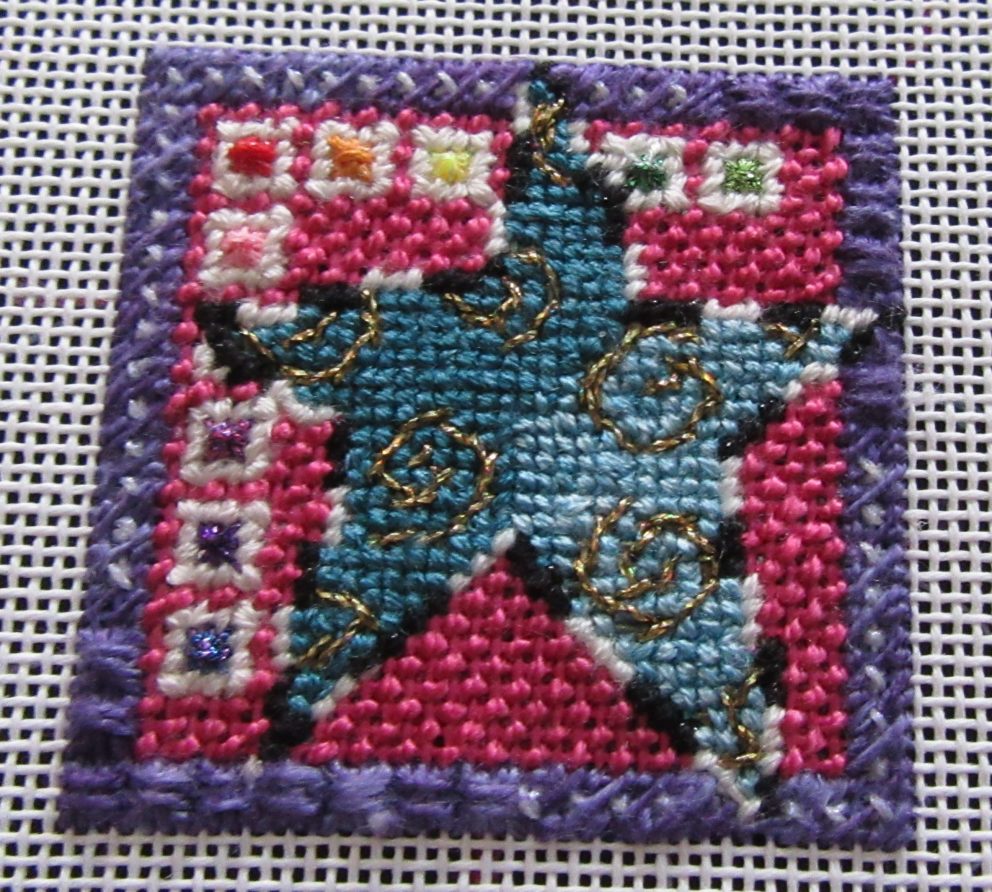
Cross Stitches are featured in this month’s free Mindy Mini stitch guide. While threads for each area are specified, this canvas is a great on to use up bits and pieces of thread.
Material
Kreink #8 (fine) metallic in 5515 (orange)9132 (yellow),026L (purple), 1232HL (white), 015 (yellow-green),5500 (pink), 242HL (red-violet), 002L (gold), 3533 (blue-violet), 3509 (green), 5505 (red)
1 skein Anchor floss 77 (use #5 pearl cotton if you can find it)
1 card Petite Sparkle Rays PS21 (white)
1 card Silk Lame Braid SL01 (black)
1 skein Flax n’Colors FNC20 Concord (violet)
1 skein Caron Waterlilies 118 Opal (white)
1 skein each Baroque Silk 1278 Deep Pool (teal), 1264 Indian Jewelry (light teal)
Mindy mini canvas 1E
Background
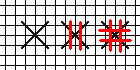
Stitch the colored squares in Smyrna Cross, below, using the various metallics.
Stitch the corners of the white squares around them in Needlepoint Cross Stitch, below, using the white silk. Stitch the remainder of these white borders in Tent Stitch.

Stitch the pink background in Skip Tent, below, using the dark pink Anchor floss or Pearl. The model uses pearl, which is preferred, but Anchor has discontinued this product in the US so you may only be able to find floss.

Border
Stitch the solid corners of the border in Double Smyrna below, using the violet linen. Make only whole units of this stitch. When no more can fit, switch to the stitch in the next paragraph.
Stitch the remainder of the border in a combination of Diagonal Gobelin, Tent Stitch, and Needlepoint Cross Stitch, above. Make Diagonal Gobelin where possible. The diagonal lines where there is a white intersection will be Tent-Cross-Tent. The slight violet cast of the white Kreinik resonates nicely with the linen.
Star
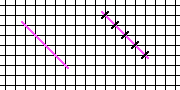
Stitch the outline of the star in Tent for Letters, below, using Sparkle Rays and Silk Lame.
Unless the line slants in the opposite direction of the stitch, this is Tent. Where the directions are different a long stitch slanting in the opposite direction of Tent is made first. Then it is crossed with Tent Stitches.
The star uses another form of shading, this one using only Cross Stitches. Because Cross Stitches are made up of two layers, you can easily use two different colors to achieve shading. The effect is best if the thread used on top is thinner than that used on bottom so more of the bottom layer shows.
Stitch the lightest and darkest areas of the star in Needlepoint Cross Stitch, above using one strand of Baroque Silk in the appropriate colors. In the area between the colors use above, but make the bottom layer in the dark color and the top layer in the light.
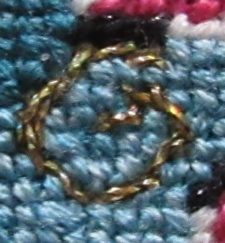
Once the main part of the star is stitched, make the spirals in Embroidery Stem Stitch using the gold metallic. This stitch can be used to make solid curving lines. It’s made of slightly overlapping oblique stitches. See the detail picture below for an example. stitch from the center of each spiral to the outside edge.

About Janet M Perry
Janet Perry is the Internet's leading authority on needlepoint. She designs, teaches and writes, getting raves from her fans for her innovative techniques, extensive knowledge and generous teaching style. A leading writer of stitch guides, she blogs here and lives on an island in the northeast corner of the SF Bay with her family
This is so cute. Do you think this could be done on perforated paper? I am thinking about making it into a little pin or magnet using stuff from my stash. I would like to use the star and the spirals on a card with stamps I have to go with it. Perforated paper is easier to keep it’s shape and for finishing I was thinking.
This was done on a painted canvas from Mindy, but something similar could be done on perforated paper. The only issue would be the background stitch. Skip Tent only covers half the intersections, so the paper would show through. If you didn’t want that you would need to change the background stitch.
Keep stitching,
Janet