You love the canvas, it’s in your stash. You find a picture that’s exactly how you would like to stitch it. There’s just one tiny catch — there’s no stitch guide.
Can you figure out how to stitch the canvas just from a picture?
While you may not get every stitch and the chances are good that many of your threads might be different, you can stitch a needlepoint from just a picture of a canvas.
Picking Threads
Use the painted canvas as your main guide for picking threads. You might be able to tell from your picture some types of thread used.
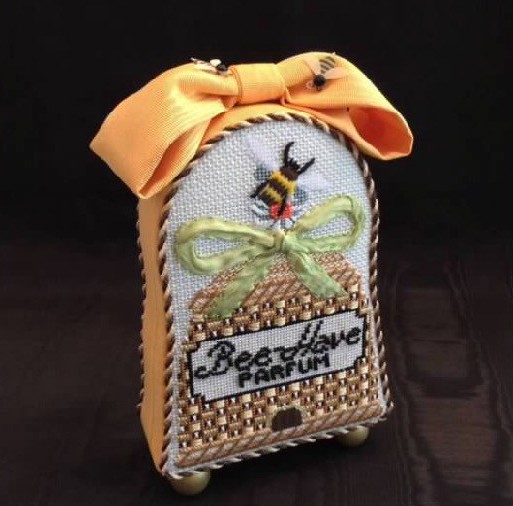
Velvet threads look different and since there is only one velvet thread out there, this is an easy choice.
Metallic threads are also obvious, but you won’t be able to tell which metallic thread they are, so chose what you like.
If there is Turkeywork, you might be able to distinguish a floss, but you won’t know if it’s silk or cotton. Make your own choice.
Often you can tell the fiber (wool looks different for example), but not the thread. Pick your thread in the same fiber.
Because, presumably, both you and the stitcher of your inspiration piece picked colors from the same canvas, your choices should be similar. But they don’t need to be exactly the same.
Stitching the Canvas
This effort seems both large and difficult because you are looking at the whole canvas. By breaking it down and stitching it bit by bit.
The first step is to have some really good pictures of the stitched canvas. If it’s the same canvas you’ll look to put the same stitch in the same area. If it isn’t the same canvas you’ll pick similar areas on your canvas.
Once you have these then you should be able to identify some things. First look for all areas that are Tent or Reverse Tent and stitch them.
The next steps you’ll repeat every time you go to stitch a new area. Look at an area where you can identify the stitch used. Stitch that area on a new canvas.
As you go along, you’ll be filling up more and more of the canvas. If you are very lucky you’ll have most of it stitched by the time you are finished going through this process, but don’t expect to get everything stitched.
The Perplexing Stitches
In almost any canvas you see there will be stitches you can’t figure out. These you’ll do last, one area at a time. These questions help you figure out what stitches are most like the one in the stitched piece so that you can pick a similar stitch.
Look at an area and ask some questions about the stitch:
- Is the stitch a special technique like Bargello, pattern darning, or Blackwork? If it is, only look at stitches for those techniques.
- What stitch family is it? This narrows down the overall choice.
- Do the stitches have a Tent or Backstitch frame around them? This identifies framed stitches and further narrows your choices.
- Do they have open threads in them? These stitches can sometimes be hard to identify in stitch books, but knowing this also helps you narrow down choices.
- Do the stitches change direction?
- Are any parts of the stitch an identifiable stitch? If so, now you know the kind of stitch to find.
Once you’ve answered these questions you should have an idea of the kind of stitch used. Look in your stitch books to find likely similar stitches. Once you do if you still aren’t sure which one to use, stitch up the likely candidates in the thread you’ll be using on a scrap of canvas and compare them to the stitched example. Put the winning candidates against your canvas to see which looks best.
The stitch you pick may not be the same stitch. Going through this process, however, has given you a stitch with a similar feel.
One Remaining Problem
Some canvases have borders or other areas that have compound stitches or stitch patterns. Usually you will not find similar stitches in your books.
Here you can take two approaches. The first is to look in magazines such as Needlepoint Now that publish stitch guides. Often these guides will have this type of stitch. You may find something similar.
The second approach is to do a similar analysis as you did with stitches. You’ll want to keep a piece of graph paper and a pencil handy.
Instead of identifying the entire stitch you are looking for identifiable parts of the stitch. When you find one, draw it on the paper. Go through, part by part until the entire pattern is charted. Test stitch it to be sure it both works and looks right.
This is harder than the same process for identifying stitches, but it employs the same “divide and conquer” technique to break a hard task down into easier steps.
Patience and observation will reward you with a stitched canvas that is close to your inspiration piece but entirely your own.

About Janet M Perry
Janet Perry is the Internet's leading authority on needlepoint. She designs, teaches and writes, getting raves from her fans for her innovative techniques, extensive knowledge and generous teaching style. A leading writer of stitch guides, she blogs here and lives on an island in the northeast corner of the SF Bay with her family
Leave a Reply