Many stitchers like to use some form of Tent Stitch for their needlepoint. Even stitchers who often use textured stitches and fancy threads find Tent Stitch needlepoint very relaxing. I find myself often disappointed with these projects because the areas of color look flat and uninteresting to me.
One way I got subtle changes in color was to switch to semi-solid hand-dyed threads. I discovered these, in the form of Gentle Arts Sampler Thread by accident. Now I use these threads almost all the time. Even using these by themselves when stitching Basketweave is not enough. Basketweave and any thread with variations create diagonal lines. They look bad.
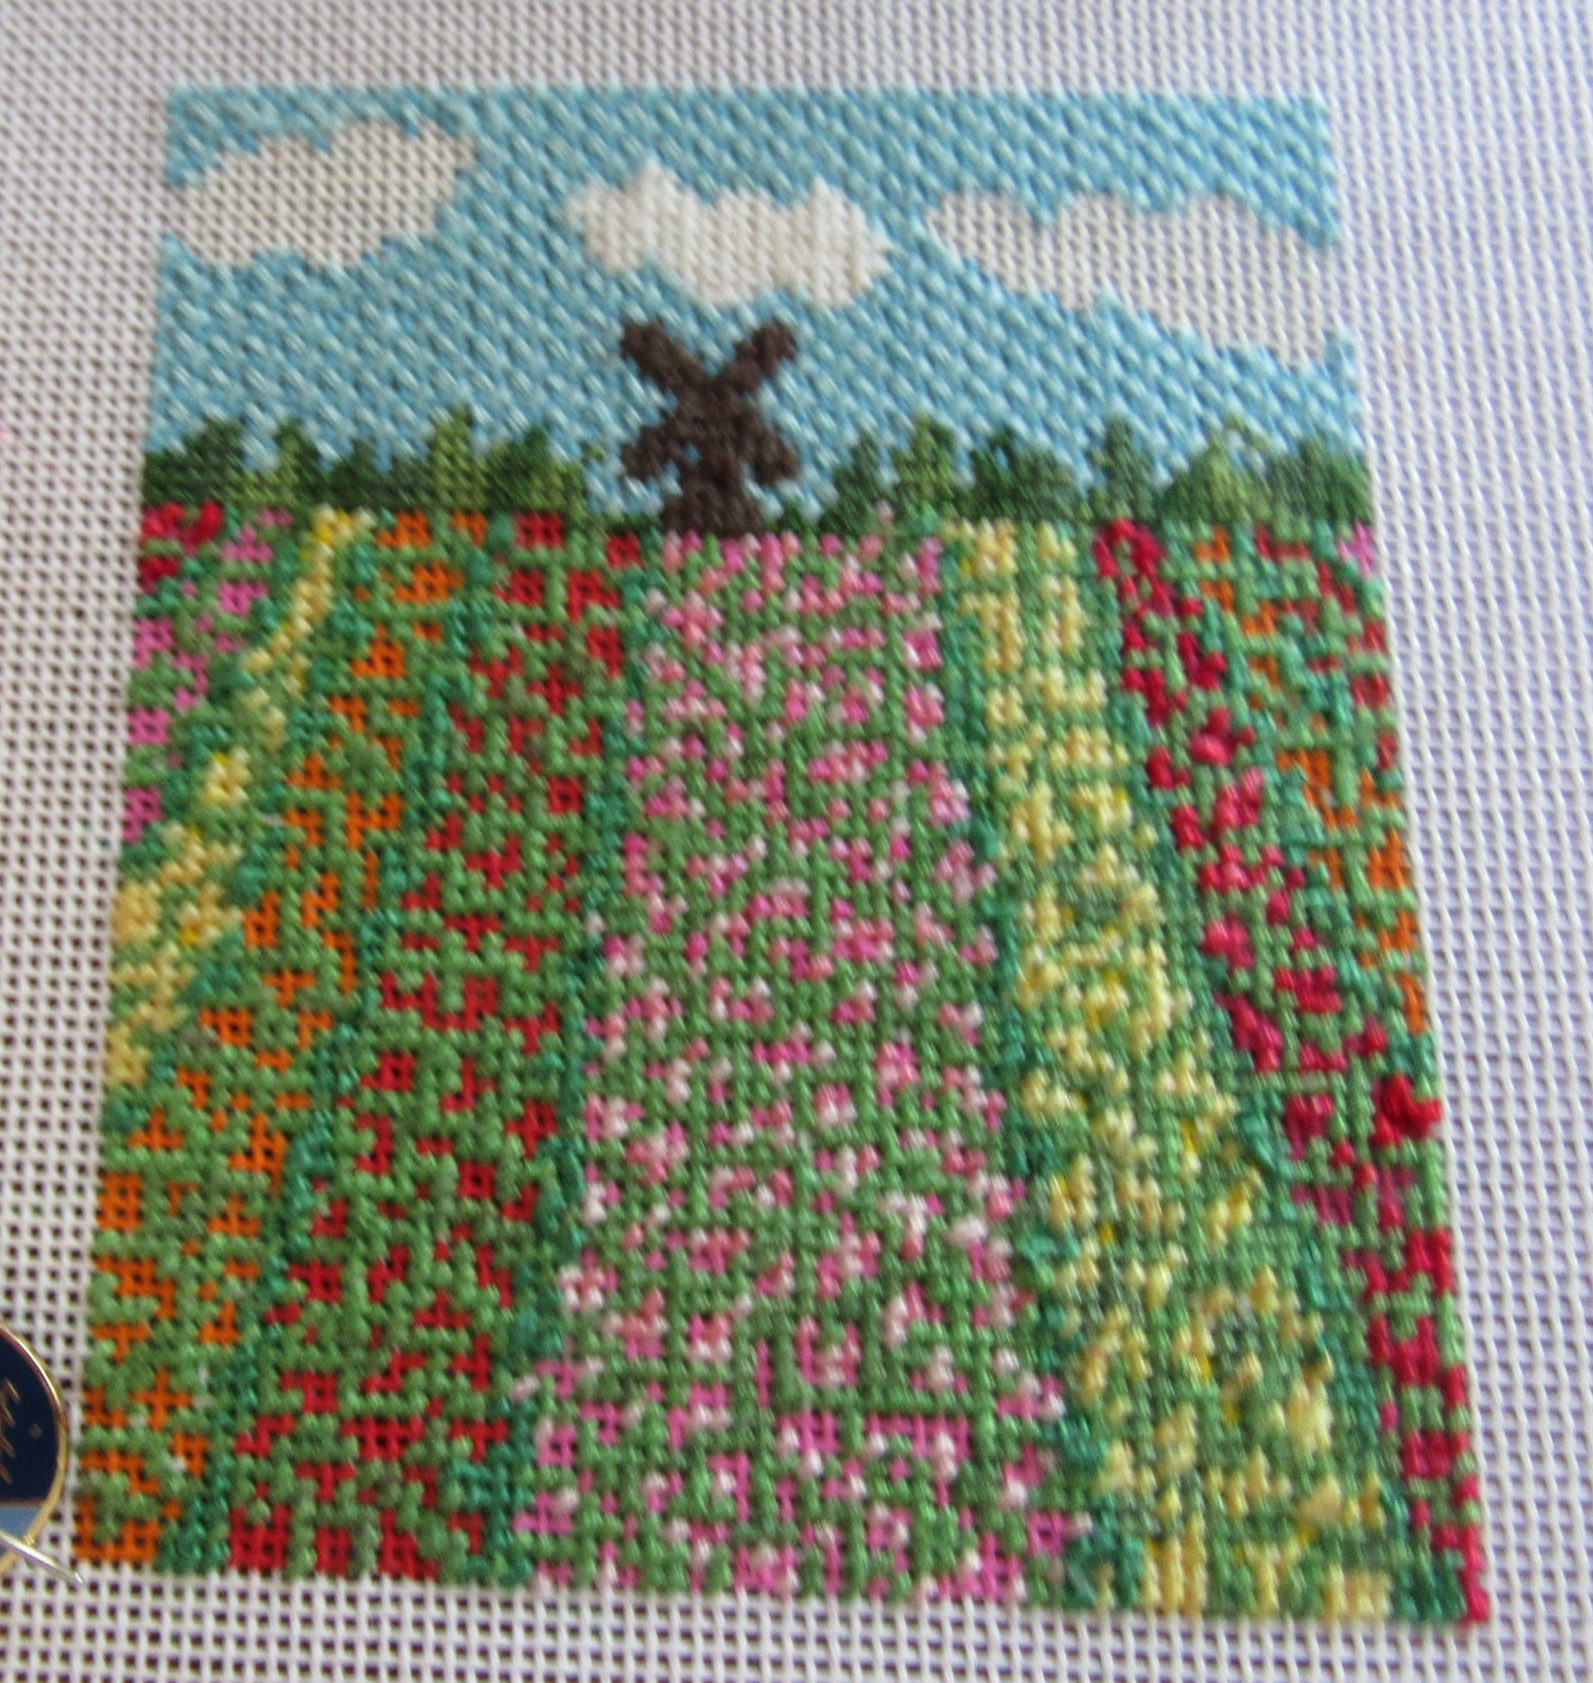
Clumping (learn how here) works in many cases. In this canvas from CSH Needlepoint Design on Etsy, I wanted a more diffuse look. Flowers are not all exactly the same color. Using this method and hand-dyed threads creates subtle and beautifully varied plants — and you only use Tent Stitch (i.e. Continental).
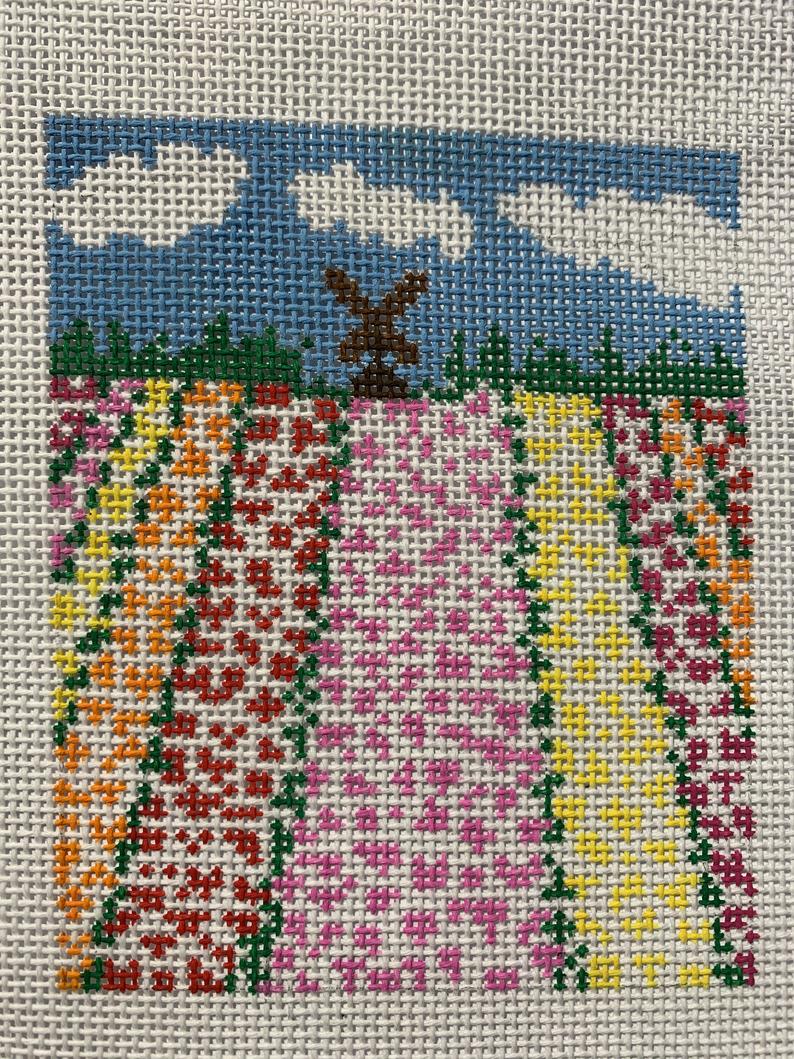
I strive for realism in needlepoint and the canvas, pictured above, had a problem — the white between the tulips. I fixed that by stitching all the white intersections using green Gentle Arts floss. There was not much variation in this shade, but it was enough to give me some realism. Look at the orange and red areas of tulips, you’ll see this. With this my leaves were complete and I could go on to the flowers.
In order to stitch fields, such as the field of mustard in the Napa Valley scene below, you’ll need at least two, but preferably 3-5, different shades of the colors you want. At least half of them should be hand-dyes. Some threads should be more muted. I did this in the yellow tulips where one thread was a pale yellow-orange. Some shades can be almost the same. I am doing this with the dark pink tulips.

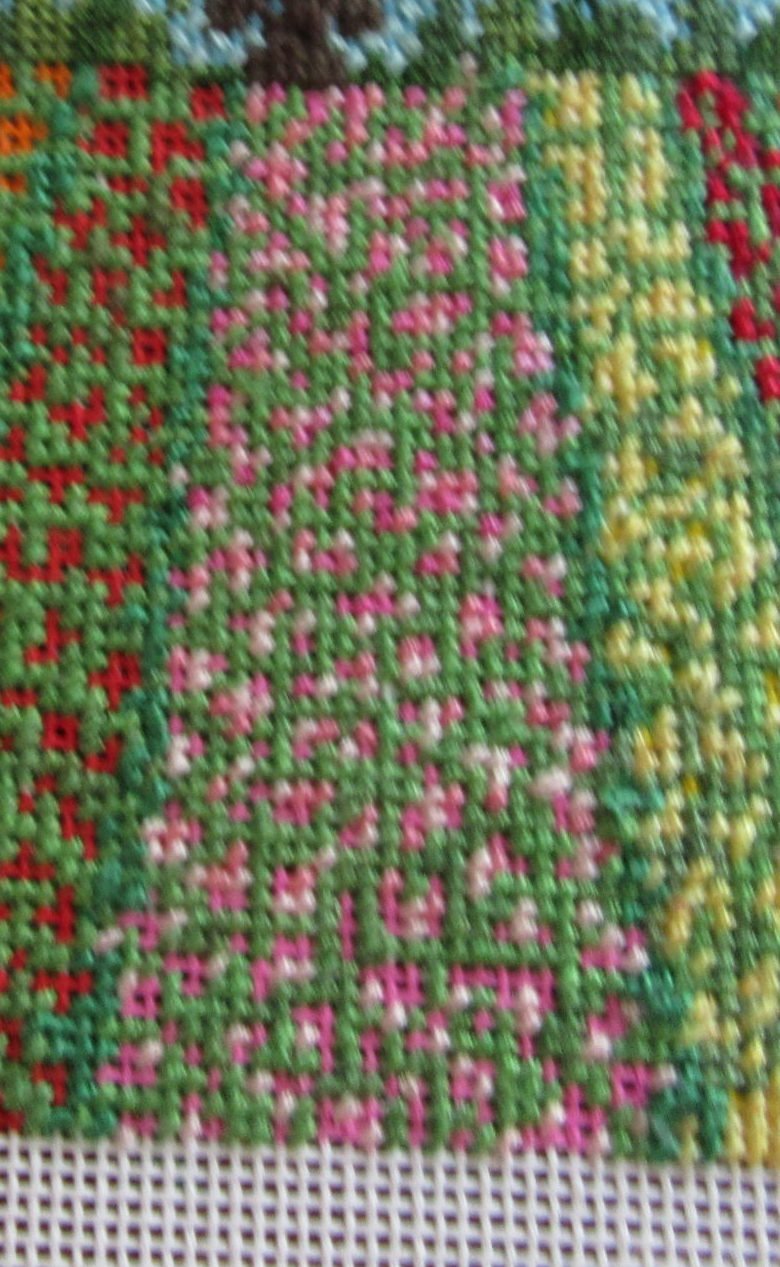
In the center area of pink tulips, you can see the steps of this process using four different colors. First I stitched scattered stitches over the entire area using my palest shade of pink. Make sure to scatter your stitches so that no area has too many stitches. Ultimately some areas have will have four different colors. Once this was complete I added a brighter pink. It comes down to about 3/4 of the area. These stitches are also scattered. If you look closely you can see that here some of the smaller areas are filled. The third thread I used was really bright pink. It goes down about halfway. My final thread was a shade with more variation. It fills the remaining threads in the top quarter of the design.
You can see from the close-up below how the colors are scattered. Looking at the picture at the top of the article, you can see how effective and realistic this is.
I love the results. if you can do a basic Tent Stitch, you can use this strategy. Yes, your back will not be neat. Yes, it takes more time than stitching in a solid color. Yes, you are not stitching Basketweave. And yes, it is still very relaxing. I think you will agree that the results are worth it.

About Janet M Perry
Janet Perry is the Internet's leading authority on needlepoint. She designs, teaches and writes, getting raves from her fans for her innovative techniques, extensive knowledge and generous teaching style. A leading writer of stitch guides, she blogs here and lives on an island in the northeast corner of the SF Bay with her family
Leave a Reply