Updated July 16, 2019
Sometimes I think I rip stitches out (frog stitching) far more than I used to. Probably it has to do with age; I just don’t see as well. On Sunday, I kept ripping things out because I kept getting the order of the rows in my stitch messed up. They were only a few stitches, but it can easily make you crazy.
But, no matter the reason, we all find ourselves ripping out stitches, sometimes a little, sometimes a lot.
There are lots of techniques for pulling out stitches, some better than others. A few years ago Joni Stevenson had a great post. about ripping out. It has some wonderful advice.
I find I rip out in one of two ways. I will pull from the front or from front and back, but only for a very few stitches. This isn’t for laudable reasons, but because I hate pulling long threads. Mostly, I cut and pull out.
When you do this you cannot reuse the thread, and it’s slow, but it does work.
Here’s how. Start to work on the back of the canvas. Have at hand:
- sort, sharp scissors with thin blades
- needle one size bigger than the one you’d use for stitching
- tweezers
Begin by cutting as many threads on the back as you can see easily. Usually these are the ones in the last row and at the ends of rows. You may find some stitches you can cut in the middle too, but don’t worry if you can’t.
Rub over this area hard with your finger to bring up the ends. Pull them with tweezers to get out what can easily be pulled (this might not be much).
Flip the canvas over and use your needle to pull out from the front a few stitches at the holes you’ve created by what you did on the back.
With you scissors trim off all the threads that stick up. This is a very important step because it gets threads out of the way so you can see more threads to cut.
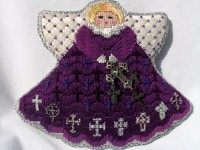
With your neatened back, repeat the whole process again and continue in this way until the area is ripped out. I did this with this Painted Pony angel when it turned out that two packages of thread with the same dyelot number were not the same dyelot. I ripped out half the skirt.
Using this process you get lots of fluff. I throw it out. The process is easier with single strand threads because often you don’t cut or pull all the strands of a plied thread.
If there is fluff at the end of the process sticking on your canvas, use a clean spoolie to remove them by pushing the spoolie through the canvas.
It’s slow but don’t be discouraged, progress is being made. I put on a movie or listen to something while I’m doing this.
The thing I love about this method is that it works for any thread and any stitch. I’ve used it on everything from soft fluffy threads to velour and stitches from tight Basketweave to textured stitches.
It also does a great job of getting out the frustrations. So I’m usually relaxed when it’s done and delighted to get back to stitching.
About Janet M Perry
Janet Perry is the Internet's leading authority on needlepoint. She designs, teaches and writes, getting raves from her fans for her innovative techniques, extensive knowledge and generous teaching style. A leading writer of stitch guides, she blogs here and lives on an island in the northeast corner of the SF Bay with her family

For the fluff, I have used scotch tape. And, I have a seam ripper but the rubber tip on these grab and “erase” the loos threads away.
I have found that an eyelash brush or clean mascara wand cleans up a lot of the
fluff/lint.
The spoolie I mentioned in the article is the same shape as a mascara brush, so that’s a great suggestion!
Keep stitching,
Janet
I am new to needlepointing, so I have a basic question about this process. If you cut out just a few stitches, isn’t there a danger of the ones remaining that were made with the same thread that was cut becoming unraveled with nothing left to anchor them with?
Yes this can happen. A great way to handle it if you are only removing a few stitches is to cut only at the far end of the area to be removed. The use you needle to pull out the offending stitches instead of cutting them out. This will leave you with a tail you can cover with the new stitches.
Keep stitching,
Janet