I struggle with Four-way Bargello, as I know many of you do. In fact most of my efforts to do it have been abandoned part-way through. The patterns are so lovely and they look as if they should be easy — then why aren’t they?
For me the first problem was how I approached stitching a four-way pattern. I thought “Everything comes together in the middle — why not start there?” WRONG! Virtually all four-way patterns have the same thing in the middle, a plus sign (+) where four stitches meet.
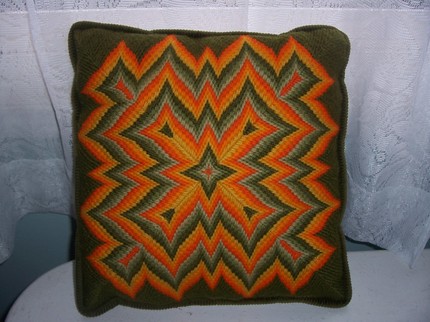
If you think about how a four-way pattern is made, this makes sense. A Bargello pattern, such as the one below, is rotated on the diagonals. This will shorten the pattern on both ends. What you’ll have left at the end is the center stitch of the entire row. Rotate this four times and what do you get? — a plus sign.
The difference between four-way patterns is how the pattern develops as it moves away from the center. It was only when I realized this that I finally learned the key to making a successful pattern: start where you can see the complete pattern. This is usually quite a bit out from the center. You will want to pick a row where the corners are complete stitches, because shorter stitches mean compensation and that could also throw you off. You’ll recognize these rows because the corners have L-shapes made of full stitches, possibkly with another L next to it of half-stitches.
Now that you have recognized this, you need to prepare your canvas. The best way to do this is to baste the diagonals on your canvas using sewing thread. Go from corner to corner along the true diagonal, making all your basting stitches the same length. This makes it easier to count. Use sewing thread or a single strand of floss that contrasts against the canvas. Usually you will want to take out the basting stitches as you work.
Having analyzed your pattern and marked your canvas you are ready to begin to stitch. Start by counting from the center out to the center stitch on your chosen line. Do not start to stitch in the corner! Stitch this line to one corner, then to the other.
You now know what the line looks like. For the other sides you can start at the corners. Stitch one side at a time, using your completed side as your reference. Often the stitched line is easier to follow than the chart because there is nothing around it.
After the first line is stitched all the way around, you can chose whether to stitch out to the edges or in to the center. Usually I stitch out because the more complete repeats of the pattern I have the more confident I am with how the pattern will work as it gets smaller.
I also always stitch Bargello, of any kind, line by line. That way I do not get messed up. The only exception I make is fill patterns where I stitch the outline first or stitch motif by motif, depending on how complicated the design is.
Applying these Lessons to Traditional Bargello
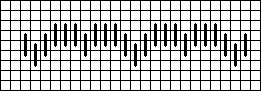
This method of working: defining the line, then stitching line by line, also works when a traditional Bargello pattern looks complicated. You know that Bargello stitches are usually four threads high and that the usual step in Bargello is half the length of the stitch.
Begin by analyzing the pattern: are the steps all the same size? The 2:1 ratio applies if every other stitch begins and ends in the same row of holes.
Are all the stitches the same size? Hungarianoint is the major exception to this. Here there is a very long stitch (over 6 threads) and a very short stitch (over 2 threads). Because of the short stitch length in Hungarianpoint the step is one thread.
Another kind of varied length Bargello has lines with stitches of different lengths. To make these work out correctly, your step may need to be half the length of the shortest stitch. This depend on the length of the stitches, however; you may need to try the lines on a doodle cloth first.
Are all the steps the same size? Sometimes steps vary within a line. If the regular step is 2 threads, then the other step often is one thread, although a steeper step would be 3 threads.
Learning to analyze your pattern and using that to help with your stitching will make stitching Bargello from charts easier.

About Janet M Perry
Janet Perry is the Internet's leading authority on needlepoint. She designs, teaches and writes, getting raves from her fans for her innovative techniques, extensive knowledge and generous teaching style. A leading writer of stitch guides, she blogs here and lives on an island in the northeast corner of the SF Bay with her family
Thank you, thank you, thank you. I have been wanting to make a 4 way Bargello but I just couldn’t get it. I thought maybe it was me, glad to hear others struggle too. With these tips I will try again. I WILL make a 4 way Bargello. You have given me hope. Jalynn