As if Christmas finishing deadlines were not bad enough, this year they are moving up. So much so that if you aren’t finishing stitching this month you might be out of luck. That’s why back in April, I decided that I would finish all my ornaments myself this year.
That posed a problem because their size, 3.75″ rounds, did not work in my favorite Lee rounds.
This was a perfect situation for the Beth Gantz wooden frames! They had long been on my list to try. My three ornaments were perfect as a test.
What’s Available
The frames are described on Beth’s site and come in two shapes, circles and squares.
Square frames are 3″, 4″, and 5″ They come in white, black, red, pink, lime, aqua, orange, purple, and dark wood. They are frames, not ornaments. With a thin layer of acetate covering the needlepoint, they could be used as coasters.
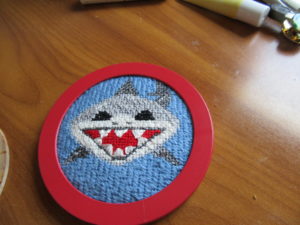
Round frames are designed to be used as ornaments and have holes drilled in them for an eye pin or hanger. They come in two sizes a 4″ round with a 3.75″ opening (seen here) and a 3″ round with a 2.5″ opening. Available colors are: white, black, red, pink, lime, aqua, orange, purple, and dark wood.
How to Assemble

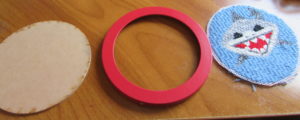
When you get your frame, you’ll see that it has two parts, a frame and a wooden back. In addition to this you will need your needlepoint. ebroidery, or cross stitch, cut to fit the frame, above.
To cut the needlepoint, use the back as your template. Make sure your stitching is centered on it and trace around the template with a fabric-safe marker. Cut out the needlepoint on the line. The line will be hidden by the margin of the frame.

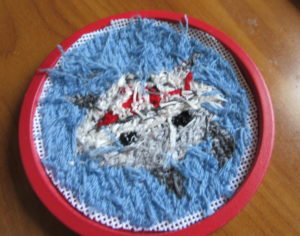
Once your needlepoint is cut and the frame is opened, place your needlepoint inside the frame, above. Be sure that the top of your ornament is at the top of the frame and properly centered.

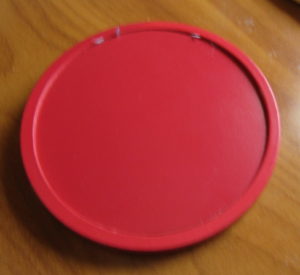
Once you have placed the stitching into the frame, place the back, painted side up, on top of it. Press hard until the back snaps into the frame. You will need to press in several places. You’ll be able to see that the back is locked in place because it will be slightly recessed, above.
Conclusion
I loved the wide assortment of colors and sizes available in these frames. With them you should be able to finish just about any round or square ornament out there (look for a future article on turning shaped ornaments into rounds and squares). I also loved that they were so easy to assemble. The longest part of the process was cutting the canvas.
Because the back is finished wood, you could easily add a personal message here by using a permanent marker.
On drawback is that while a hole for a eye pin or hanger is drilled on te rounds, no pin is present.This means you don’t know which is the top and may assemble it wrong (I did). Although it doesn’t take long to fix. I would like to see either an eye pin or a mark on the back indicating the top. For square ornaments you will need to drill your own hole.
In its abswence I plan to add a mark on my next finish to make this great product even better!
About Janet M Perry
Janet Perry is the Internet's leading authority on needlepoint. She designs, teaches and writes, getting raves from her fans for her innovative techniques, extensive knowledge and generous teaching style. A leading writer of stitch guides, she blogs here and lives on an island in the northeast corner of the SF Bay with her family

Leave a Reply