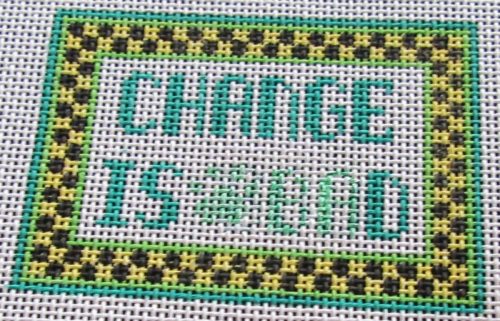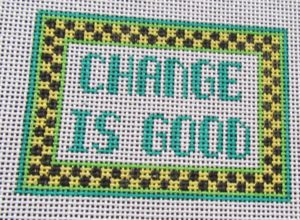
In our house we have a saying “Change Is Bad.” This is because of our cats. Perpetual 2-year-olds, cats (and dogs too) like things to be The Same. Feed them at the same time, let them sleep in the same chair, and don’t go away on the wrong day, and they are happy.
So when I saw the Canvas Connection canvas, I knew I could change it simply into something that was appropriate for our house. Although this process works for any design, the fewer things you need to get rid of and replace, the better.

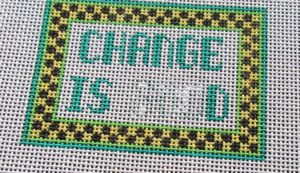
- Decide what you will be changing. I can keep the “d” in “good,” so I will get rid of the first three letters and replace them with B, A, and a cat paw print.
- Use a white or matching acrylic paint to remove what is going. Doing this will make it much easier to put in the new design. My tests have found that fabric marking pens do not cover well.
- Chart out your new elements. I can use the same A that is in change and I can create a B from the D. I will look for a cat paw chart on-line. Charting means you can be sure your new design will fit.
- Draw the new elements with a Fabric marking pen. Be sure to color intersections, just like the canvas. While the coat does not need to be even, it does need to be dark enough so you can stitch easily.
- Let dry overnight and stitch. You can see the canvas ready to stitch at the top of the article.


Additions are easier, just follow steps 3-5.
I’m pulling the threads and starting to stitch today. It will be finished in a small frame.
About Janet M Perry
Janet Perry is the Internet's leading authority on needlepoint. She designs, teaches and writes, getting raves from her fans for her innovative techniques, extensive knowledge and generous teaching style. A leading writer of stitch guides, she blogs here and lives on an island in the northeast corner of the SF Bay with her family

Leave a Reply