In a series of articles that ran recently in ANG’s magazine, Needlepointers, we learned about how to use stencils to create our needlepoint designs. It’s a fantastic method for creating original designs.
But what if you don’y need a whole design, but just a background. Perhaps even one to go behind the focal points in a painted design.
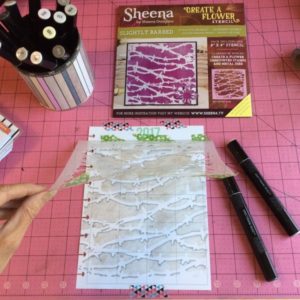
This tutorial from Craft Gossip shows how to use a stencil to create a background for a planner page.
Here are ways to modify it for needlepoint.
If your design already has areas painted on the canvas, mask them off. You can use cut up paper, press & seal wrap, or just tape to mask. However, whatever you use, tape completely around the edges and press this tape down firmly. This way no color gets where you don’t want it to go.
If needed mark the outside edges of your stitched area, so you know where to stencil.
Tape down both the canvas and the stencil on top of it.
Stencil using markers safe for fabric (test them first). Some possibilities include Copic markers, Fabric Mate, DecoColors for fabric (they make several kinds), SC-UF, and Pigma Microns. Wider Markers will work better for this job.
Color the stencil as in the tutorial. You can also embellish with other stencils as they did.
Let dry overnight before stitching.
About Janet M Perry
Janet Perry is the Internet's leading authority on needlepoint. She designs, teaches and writes, getting raves from her fans for her innovative techniques, extensive knowledge and generous teaching style. A leading writer of stitch guides, she blogs here and lives on an island in the northeast corner of the SF Bay with her family

Leave a Reply