I love to make stitch samplers and they are one of the best ways to try out stitches to see how they look in a larger context. Plus while you are trying out stitches you make something lovely. It’s a win all around!
Throughout this article, you’ll see pictures of some of the samplers I’ve stitched. Most of these are available as projects, printed books, or as part of the 25 Stitches series of classes (check out my Etsy shop to buy them).
The most important aspect of creating a needlepoint sampler is unity. There must be one or more common elements to unify the design. This is different than cross stitch samplers which do not have unity as an aspect. The three elements that can unify a design are color, stitches, thread, and size.
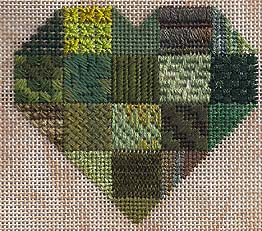
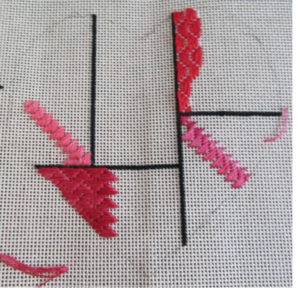
Color is an easy one to see. With color as the unifying aspect, your threads will be in similar colors, although there should be variation in shade and thread. Both the in-progress sampler at the top of the article and the green heart sampler above has color as the unifying aspect. With the green sampler, I put many green threads in a small plastic bag and picked them randomly for each square. To keep things lively I looked for different textures and shades as I picked the squares to stitch.
When working with one color in a sampler, pull out more threads than you need in the color you choose. Try to get as much variety as you can within your chosen color. Look for hand-dyed threads, ribbons, and metallics to add variety.
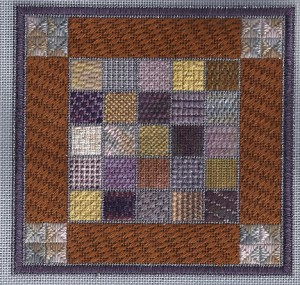
Size is an very open category for a sampler and one that can unify stitches that would not normally go together. in the sampler above, one of the Small Stitch Samplers, all thje stitches needed to be smaller than 3×3 threads. My motivation for creating the samplers was that I was frustrated finding interesting stitches for the small spaces I was finding on painted canvases. In all I used over 100 stitches in the samplers. It made for a very lively sampler.
Size can be the main unifying factor. It will make samplers that have more variety than any of the other aspects.
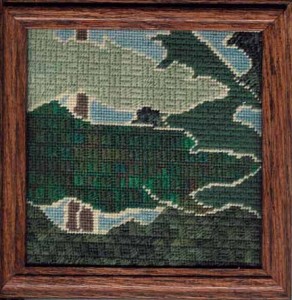
Stitch is a very fun way to make a sampler because there are so many stitches out there. The way to do this easily is to pick a stitch family, one that has plenty of variations. After you have done this, look in all your books and on the Web for diagrams and variations of the stitch. You’ll soon know if there are enough foer your planned sampler.
Start by placing a stitch you know in one if the areas. Pick one at random or pick one that will allow you to build therest of the sampler around it. By starting with a stitch you know, you’ll be getting used to the rhythm of the stitch. Continue picking areas and stitches (read more about placement in the last section below) until your sampler is filled
You can also do a sampler of techniques. I have done successful samplers this way for Bargello, Blackwork, and Pattern Darning.
Thread is an aspect that I have not explored much before. That’s at least partly because I have a serious addiction to thread. I love it; the more unusual the better. But I am thinking of making this the next sampler I do, possibly another heart, using just one thread.
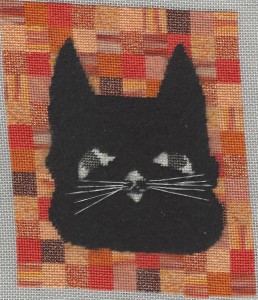
Although I haven’t made a single thread sampler, the background of this Halloween cat (a free project here) had thread as the highlight. The design started because I wanted to get to know orange. I bought every orange thread I could find at my LNS and all in my stash. To even the playing field I only used Tent and stitched the blocks the same size. It worked and it shows off many threads. It can be a great way to create a lively background for a bold focal point and make a sampler at the sametime.
As you can see, just about anything can be the basis for a needlepoint sampler. That’s a big part of the fun. Here you see how easily simple shades, quilt blocks, and even vintage tiles make samplers that serve their purpose but are original and fun.
Creating a Stitch Sampler
Stretch your boundaries. Create your first stitch sampler.
Begin by picking a stitch family. It should be one with plenty of variations, even if you only know one or two to start. Look on the Web for more variations of the stitch (there are tons of them on this blog). Pinterest and Instagram are other good sources for stitch diagrams. You don’t need to pick specific stitches now, just know where to find them.
The next step is to pick your design. An easy way to start is to pick a shape and divide it into squares. That’s how the heart samplers were developed. The new sampler took the heart shape and just divided it into unequal areas. You can do the same, Find a free template in a shape you like, print it out and trace it onto the canvas with a Pigma Micron marker.
Next, pick your color. Pick a color you like or a color you want to explore and find your threads in this color. Grab more than the number of areas in your sampler. That will give you plenty of choices.
Although you can start stitching now, picking threads and stitches from your chosen family (start with ones you already know), you might want to do some more planning. To do this look at your possible stitches and pick as many as you need to cover all the areas. Don’t assign them to areas at this point.
With samplers I LIKE to scatter around stitches that have similar looks; it makes the sampler more lively. I start with a stitch I know so I can get into the rhythm of the stitch. Then I stitch the area. I pick another stitch. If it is similar to the one I just used, I put it in an area far away. If it is not similar I put it in an adjacent area. I pick my thread similarly.
Working this way, area by area, I build up the sampler. As it fills you may find similar stitches closer than befor but by following this method you will rarely get similar stitches next to each other.
You have not only taught yourself some new stitches, you have easily created an original design.
About Janet M Perry
Janet Perry is the Internet's leading authority on needlepoint. She designs, teaches and writes, getting raves from her fans for her innovative techniques, extensive knowledge and generous teaching style. A leading writer of stitch guides, she blogs here and lives on an island in the northeast corner of the SF Bay with her family

nice post