Updated May 22, 2020
If you look around, you’ll see plenty of examples of art on plain paper. Think of illustrations in Natural History books, book illustrations, illuminated manuscripts, or even many watercolors.
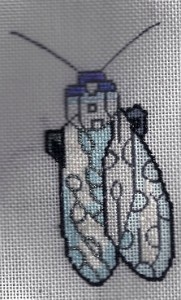
Several years ago I started doing a series of needlepoint bugs designed by Mika Partridge (some currently available from Julia’s Needleworks, pictured here (scroll down). I wanted them to be like those illustrations in Natural History books. To do this I would need to have a background that looked like paper.
Since that time, I’ve used this type of background often for needlepoint pieces. I’ve come up with several stitches that I use for backgrounds.
To stitch them, you’ll need a thread that is white or shades of white. In these designs you’ll see that I’ve used Silk n’Colors in Old Lace (woven plait), linen (straight T) and Pebbly Perle (T stitch). Other threads that work well include silk perles, soy luster, and perle cotton.
Straight T
This is a two direction darning pattern. Make all the stitches in one direction first, then all the stitches in the second direction. You can also make this, as I did, one row at a time. Julia Snyder calls this stitch Hatch and it is in several of her books.

Because the stitches are straight, they are longer than those in T Stitch. One great thing about this stitch is that it can be done quickly.
T Stitch

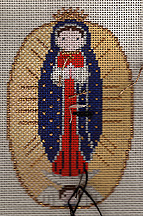
This old favorite is great for stitching “paper” backgrounds. It’s effective done in one thread, as is done here, but it works equally well in a semi-solid thread. Here it’s the outside of this Petei Our Lady of Guadalkupe.

I love this stitch and I think it’s interesting how different it looks in the matte white Pebbly Perle and in yellow metallic.
Woven Plait

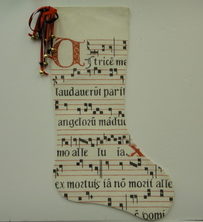
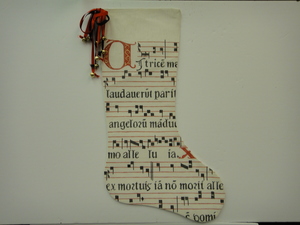
I love this delightful stitch. I like the texture it gives. Stitched in a solid color, it’s lovely. But when you combine an overdyed thread with clumping the colors, you get something that really looks like old paper. It’s fantastic! I’ll be using it as the main stitch for the chant stocking from The Studio Midwest I’m stzrting later this week.

There are two keys to creating the clumps.
1. Do not stitch in straight lines, but in more or less round groups. This will create clumps of color that meet other clumps creating the overall effect.
2. When the color on the thread changes, move to another location. You start with a clump and add stitches around the edges. When the color changes, move to another area, adding on to existing clumps along the edges of the same color. As an alternative you can begin a new clump right next to the one you are stitching.
About Janet M Perry
Janet Perry is the Internet's leading authority on needlepoint. She designs, teaches and writes, getting raves from her fans for her innovative techniques, extensive knowledge and generous teaching style. A leading writer of stitch guides, she blogs here and lives on an island in the northeast corner of the SF Bay with her family

The pictures are too small for me to see the detail of the stitches. I tried clicking on them, but the picture that opens is still small.
Please make it possible to view larger versions of the pictures, or use pictures that are magnified enough to make out the stitches.
Often these are older pictures that may not be optimized to be made larger.
Keep stitching,
Janet