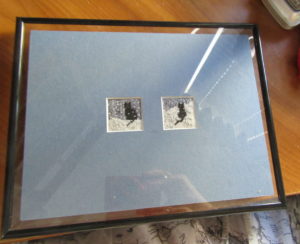
Recently I found myself with a problem. I had stitched two small Needle Crossings cats to match my Bingley & Darcy. I had a custom mat cut to put them into what I thought was a standard-size frame. I could not hang that frame. so I needed to find a new one I could hang. Unhappily, because it was not a standard size, I could not find a new inexpensive frame. Searching the store I came up with this lovely idea.
You can buy floating frames in several standard sizes. These frames consist of two panes of glass, often held together with clips (called clip frames). You sandwich the matted needlepoint between the glass and center it. It’s framed and ready to hang. The one used here, which I cannot find online, has blqck sides that slide onto each edge, holding the frame together.
Here’s how:
- Block your needlepoint, if needed.
- Find a standard mat or have a custom mat cut for your needlepoint. (Custom mats are significantly cheaper than custom frames & can give your work a special look)
- If needed, use artist’s tape to tape the needlepoint on the canvas edges to the back of the mat.
- Find a frame at least 1/4″ bigger all around.
- If you are not hanging the picture put a backing behind the needlework, cut to match the size of the matted work. Use double-sided tape to attach it to the back glass.
- put double-sided tape on the back of the matted needlework. Center it and press down to attach it to the paper backing or to the back glass.
- Reassemble the frame following the manufacturer’s instructrions.
- Hang it and admire your work.
I bought my frame at Hobby Lobby, but you can find them
About Janet M Perry
Janet Perry is the Internet's leading authority on needlepoint. She designs, teaches and writes, getting raves from her fans for her innovative techniques, extensive knowledge and generous teaching style. A leading writer of stitch guides, she blogs here and lives on an island in the northeast corner of the SF Bay with her family

Leave a Reply