Updated July 30, 2019.
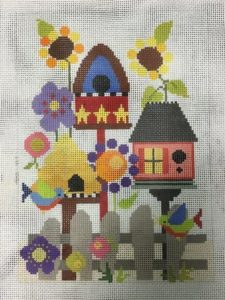
Many needlepointers (myself included) find flowers one of the most challenging things to stitch. In fact I have a lovely flowers and birdhouses canvases in my stash that’s one of my aspirational needlepoint pieces because I find flowers so challenging.
The curved edges of flowers don’t fit the squared-off nature of needlepoint. It can be hard to make them look realistic. Often we don’t think of using surface embroidery techniques on canvas.
You can adapt surface techniques to canvas to make realistic flowers. In starting the poppy canvas, I found that I really needed to make my flowers both dramatic and realistic in order to do justice to that wonderful bright background.
Here are two ways you can use to do the same.
Satin Stitch Flowers
I learned this technique from Brenda Hart who taught it in a class on a flower-filled Lee kimono several years ago at TNNA. Basically, you use single Satin Stitches in various slants to fill in the entire petal. The key to this technique is the order you use to get a realistic slant. Begin by making one stitch from the top center to the bottom center.

Then split the difference on either side by making one stitch in the middle, also going from the top to the bottom. Do this on both sides (like the photo above). If there is only one hole at the bottom, these stitches will all go into the same hole. If the bottom is broader some of the stitches might go into other holes.

Continue this “splitting the difference” by making new Satin Stitches between every two stitches you have made. The photo above shows one side of a petal done this way and the photo below shows a completed petal.

As you can see this method produces a very smooth petal with rounded tops and sides. You may need to make shorter stitches along the sides or you may need to make some fill-in stitches that cover thinner or black areas. If your canvas is painted the same color as your thread, thin areas will be less noticeable.

When I was thinking about California poppies I think about how they almost seem suffused with bright yellow under their bright orange. In order to get this effect, you would want to have a complete layer of satin stitches in one color, overlaid with satin stitches in another color. I made the orange much too dark in the picture below to demonstrate the look. You could also use short Satin Stitches at the base or top of the petals to add color, or even make stripes using this method.
Long and Short Stitches
Another surface embroidery technique to adapt is Long & Short Stitches. I think this gives a more textured effect, better suited for crepey petals.

This technique begins at the base of the petal. Make one stitch in the center, going partway up the petal. Continue making more stitches from the base, making each stitch a different length. You end up with something like the petal pictured above.

Now you need to fill in the petal with more stitches. These should all be approximately the same length but may differ in angle. Try not to make stitches next to each other both the same length and angle, as this will set up lines inside the area. What you want is an overall textured look, as in the picture above.
You can also use this method to vary color at the top or bottom of a petal. If you end up with some lines, you can always break them up by adding another stitch or two on top.
About Janet M Perry
Janet Perry is the Internet's leading authority on needlepoint. She designs, teaches and writes, getting raves from her fans for her innovative techniques, extensive knowledge and generous teaching style. A leading writer of stitch guides, she blogs here and lives on an island in the northeast corner of the SF Bay with her family

A easy innovative way to learn the long and short stitch.Thanks very much for the tutorial.