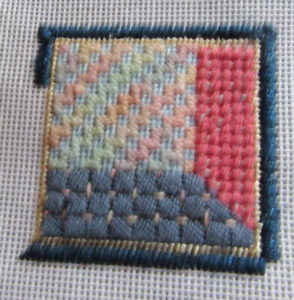
If you are using Straight Gobelin as a border, the corners always pose a problem. You can just have the stitch go straight across on two sides and stop before the corner on the other two sides. This creates overlapping corners. A neater solution is to miter the corners, creating corners like those on picture frames. In this article, I’ll show you step-by-step how to do this.
The key to mitering corner is to decrease the length of each stitch, going toward the outside, making the stitches meet at right angles throughout the corner.
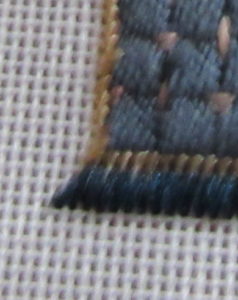
Each side will look something like the picture above as the stitches diminish.
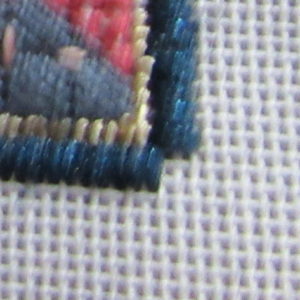
My preferred method to do this is to stitch each side until you get to the last stitches that are the full length, above.
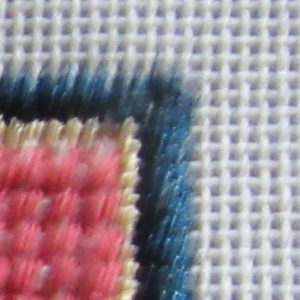
Once you have reached that point I go stitch by stitch, alternating sides, until the pair of stitches only covers a single thread, above.
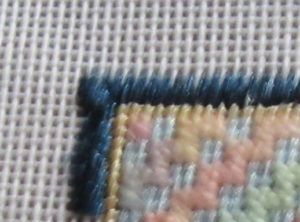
You could stop there because the corner is mitered. I don’t like that bare hole in the corner, however, because the corner is not crisp. As the last step, I make one diagonal stitch, going from the empty hole to the outside corner, above.
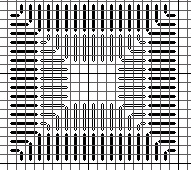
Here’s a diagram of what a mitered corner without the diagonal stitch looks like. You can miter Straight Gobelins of any length using this method. I ave even mitered other straight stitches this way, but the process is a bit more complicated because stitches the same length do not always meet.
About Janet M Perry
Janet Perry is the Internet's leading authority on needlepoint. She designs, teaches and writes, getting raves from her fans for her innovative techniques, extensive knowledge and generous teaching style. A leading writer of stitch guides, she blogs here and lives on an island in the northeast corner of the SF Bay with her family

Leave a Reply