Article updated January 19, 2021.
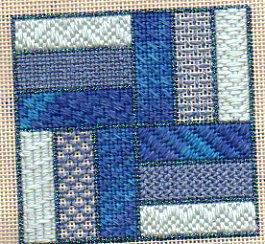
Whenever you buy a painted canvas or when you design your own needlepoint, you will need to pick stitches for it. Here are some simple rules for deciding what stitch should go where.
Every canvas, no matter how big or small, should have some areas of tent stitch (Basketweave). Think of this as “neutral texture.” By having some Tent Stitch, the eye gets a place to rest. Without some Tent Stitch, the canvas will look way too busy and can be difficult to read. Areas that almost always need to be stitched in Basketweave include areas with lots of detail (like faces), areas that are very narrow (like these Chinese characters), and areas with shading.
Sometimes your choice of a stitch is determined by what the design is showing. For example, if you were needlepointing a cat, you probably wouldn’t want to use a strong geometric stitch for the cat’s fur (although it might be a very cool background). But if you were stitching a brick wall, that kind of stitch might be just the ticket.
The stitch scale is also important; it must work with the scale of the area on the canvas. Any stitch you use should be repeated at least three times in all directions; if it doesn’t, this stitch is too big for the area. Pick a smaller one. The bigger the scale of the stitch, the more attention it draws to itself. For example, if you were stitching a sunflower, you might want to emphasize the petals or the center. If you wanted to emphasize the center, that’s where you would put the larger stitch. The larger the pattern, the more your eye will be drawn to it.
Sometimes the combination of thread and canvas mesh rules out some kinds of stitches. The thread/stitch combination might be difficult to work as is. In those cases, you might want to thin out the threads by using one fewer plies. Or you might want o pick another stitch. If the coverage in this combination looks too thin, thicken the thread by adding another strand or adding a strand of crewel wool or embroidery floss in a matching color to your base thread. Usually these additions don’t stand out but make the needlepoint look better.
The best method for checking out a stitch is to try it. Stitch a bit on your doodle canvas, make a sample for your stitch notebook, or try a little bit of the stitch on the canvas. If it doesn’t look right, frog stitch (rip-it-,rip-it). I’ve sometimes done this with entire stitched areas and sometimes I’ve stitched the same area several times before I find something perfect.
About Janet M Perry
Janet Perry is the Internet's leading authority on needlepoint. She designs, teaches and writes, getting raves from her fans for her innovative techniques, extensive knowledge and generous teaching style. A leading writer of stitch guides, she blogs here and lives on an island in the northeast corner of the SF Bay with her family

can you suggest a good stitch to represent straight hair.. .did similar french knots for curly need a stitch for straight was thinking chain stitch but do not know how to tie in the second row
I have a couple of suggestions, based on hair I’ve done in my last couple of pieces. In the Teacher picture frame I used couching in lines side-by-side using Rainbow Tweed.
In the mermaid I stitched the darker lines in Whipped Backstitch and then filled in the locks in Basketweave using a blended thread of one strand each of two different colors of Rainbow Tweed. Occasional locks were stitched in Reverse Basketweave.
Some other possibilities would be to use Lng & Short Stitch, Encraching Gobelin or Split Stitch to make hair.
I like Rainbow Tweed for hair because it’s a pliable yarn which has variation in color, but not regular variation (unlike overdyes). I also think it looks like hair.
All these techniques give you hair which has texture but is still straight. Some of them are more advanced techniques, but the hair I did for the Mermaid is pretty easy. Just make a line of Backstitch,then wrap around it with the same thread; this makes the darker lines and adds some raised texture. Then fill in the areas you have defined, one by one, using the lighter thread. I used a blended thread, but you don’t need to.
Hope this helps!
Keep Stitching, Janet
Great post! Another one of your great articles on choosing stitches and threads for a canvas. Although I have a lot of needlepoint books, most books do not explain the process of choosing one stitch over another. All you get are chapter after chapter of stitch names and stitch diagrams. It is like presenting you with a complete spice rack in a kitchen, but no hints on which spices might work to season a beef stew.