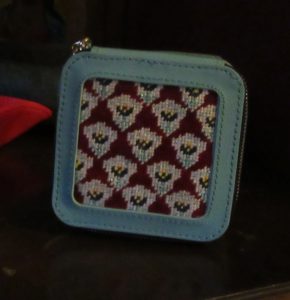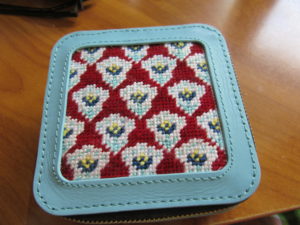
Planet Earth added to its line of self-finishing products last year with a leather travel jewelry box. Leather with a strong zipper, the inside is lined with striped material. There are two small compartments and one larger compartment with rolls for earrings or rings inside. The lid has two matching leather straps that snap to allow larger items to be held securely.
It holds a 3″ square of needlepoint and you can finish it yourself. Currently, it is available in three colors: red, light aqua, and black. I recently made two of these using the inserts from Anne Fisher Needlepoint.
Finishhing the Box
If you are used to finishing items from Lee or the smaller Planet Earth items, you’ll find this to be a surprise. The sides and top are quite stiff, stiffer than the Lee boxes. Considering that this box protects your jewelry, this is a good feature.
I also found this adhesive to be more sticky than that used by Lee. When I finish a Lee piece the adhesive does not grip strongly until you press it down. Here the adhesive gripped almost immediately.
Neither of these characteristics is a huge problem, just a surprise.
The margins for the needlepoint are generous, 3/8’s of an inch. The leather is thick and the opening has rounded corners. Take the time to lift and loosen the leather all around before you remove the adhesive.
While the rounded corners are lovely, they do make the edges harder to tuck in unless you cut the corners at a diagonal. To finish, I trimmed the needlepoint to two threads beyond the stitched area. I cut all corners on the diagonal, just outside the stitched area.
After removing the protective paper on the adhesive, I placed the needlepoint centered in the top. It adhered right away. That left the edges to tuck in. Many finishers suggest using a butter knife for this purpose, but that’s a little big here. Using my fingers, I lifted the edges of the leather and ticked in the bare canvas. That worked until I was close to the corners.
I found a surprising tool that worked perfectly — an orangewood stick for manicures. I could easily switch from the slanted to the pointed ends to finish the job. Because the leather is thick, it holds the needlepoint in securely and does not distort as you are finishing. It looked fantastic as soon as I had finished and ready to go on its way.
Tips for Success

With the projects I stitched I found it hard to test the fit. You might want to test the fit before you start to stitch or check the fit with a color copy that is cut to the size of the stitched needlepoint.
The paper covering the adhesive does not have a slit in it. To remove it, you’ll have to lift one edge, find the paper and lift it only. Then pull. Mine did not come out in one piece. Once some was out, the rest was easy to remove.
Keep, the zipper closed while you work.
The zipper is very rugged but also stiff and hard to move, especially at the corners. It will become easier with use, but you might consider using beeswax to make this easier.
Conclusion
Although I struggled with the finishing the first time through, the second box I made took less than 10 minutes to finish. In short, these boxes are elegant useful, beautiful and easy to finish. They make perfect gifts or accessories. I can’t wait to make more.
About Janet M Perry
Janet Perry is the Internet's leading authority on needlepoint. She designs, teaches and writes, getting raves from her fans for her innovative techniques, extensive knowledge and generous teaching style. A leading writer of stitch guides, she blogs here and lives on an island in the northeast corner of the SF Bay with her family

Leave a Reply