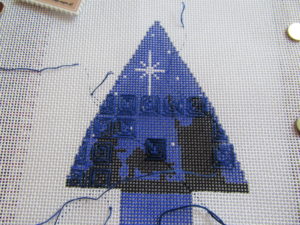
Recently I have seen pictures of many canvases that have been very lightly stitched. While I have done several projects using shadow, or lite, stitching in the past, I struggle with the look. I decided to use this charming Kelly Clark canvas to test some different options.
I picked this canvas because the simple design of the Holy Family in silhouette against the night sky has a narrow color palette that would allow stitching in a single color. The canvas is small enough that I could stitch enough to test without spending too long on each test. Also, the silhouetted people have enough detail to show results but not so much detail that the choices are not clear.
In each test, I hope to show the same stitch or technique done with two different threads. For each test I’ll cover the stitch or technique in general first, then I will compare the results, and finally, I’ll provide conclusions and tips.
Brenda Hart Rectangles
Several years ago in a local guild newsletter, I saw a cool idea. It was from Brenda Hart and used thin threads and a series of three or four nested rectangles as a stitch to completely cover a canvas. Since then I have seen this technique used on other pieces.
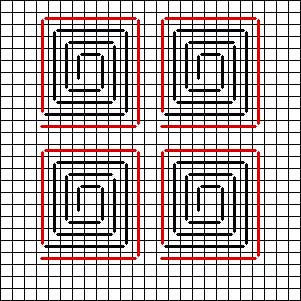
I have been looking for a canvas that would work as a way to test this. When I found this stitch in Lone Star Stitches, I knew I had another stitch that would work here. This stitch comes in two sizes (the stitches added for the larger size are in red. In consists of straight stitches that increase in length. If you are familiar with quilts, this is similar to the construction of a Log Cabin block.

The smaller stitch has 12 stitches in each unit. The larger version has 16. The placement can be a little hard to see. Note that the ending stitch for units that are next to each other in a row have one thread between them, This results on one hole between the vertical sides of these units. Looking at a vertical column, there are two threads between adjacent units.
The Tests

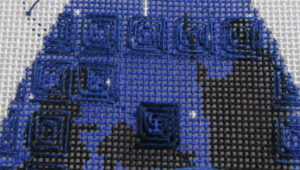
Using this stitch I made the swirls using two different threads. The thinner thread is Londonderry Linen from Access Commodities size 50/3 in 5078 Bluebonnet. It was used for the majority of the stitching.
The second thread was a cotton thread made for Sashiko from Japan. It is a single-strand thread similar to Sulky Petites in weight and texture. I used it for only a single unit, near the bottom center.
You can see the two threads against the blank white canvas near the trunk in the picture at the top of the article.
The stitching you see is my third round of stitching. Initially, I tried the linen but I did not like how thin it was and how hard things were to see. I cut it out and switched to the Sashiko. I loved how it looked for the sky, but its thickness blots out the figures almost completely. Because the point is to stitch the whole canvas in a single color and thread, this would not work.
The third try used the thinner thread and I think it’s quite effective. I like the look. Seeing the thicker thread in contrast shows how effective this technique can be.
Conclusions and Tips
The linen thread I used was about half the thickness of the cotton thread. In this technique, thinner is better. In order for the canvas detail to show trough, the thread must be significantly smaller than a canvas hole. The thicker thread completely blotted out the detail of the manger.
If you are using very fine threads to stitch, you’ll find that starting and ending threads is difficult. As much as possible have long tails and start your thread with a waste knot. In order to stay in place, you’ll need to make several knots in one place. End your threads the same way, with tails left outside the stitched area. If you can secure these ends with a narrow Tent Stitch border surrounding the piece.
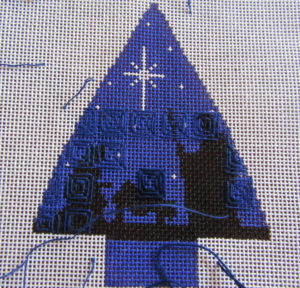
If you want to be sure of the color peeking through the stitching, back your canvas with a piece of tulle in the desired color, basted outside the stitched area. As you can see by the picture below, having a darker backing made the design more effective, but it was harder to stitch.

You could also use Away Waste Knots and weave in beginnings and ends after your stitching is complete. If you have a tulle backing, you can end your beginnings and ends by weaving them in and out the fabric changing the direction of the stitch.
I could begin and end threads on the back, but with so little thread there, it was hard.
Be sure to stitch in bright light. The nature of this stitch means that often there are stitches on the back of the canvas that follow the same line as the stitch you are about to make. This can make it hard to see stitches. A good light helps!
Come back Thursday for the next pair!
About Janet M Perry
Janet Perry is the Internet's leading authority on needlepoint. She designs, teaches and writes, getting raves from her fans for her innovative techniques, extensive knowledge and generous teaching style. A leading writer of stitch guides, she blogs here and lives on an island in the northeast corner of the SF Bay with her family

Leave a Reply