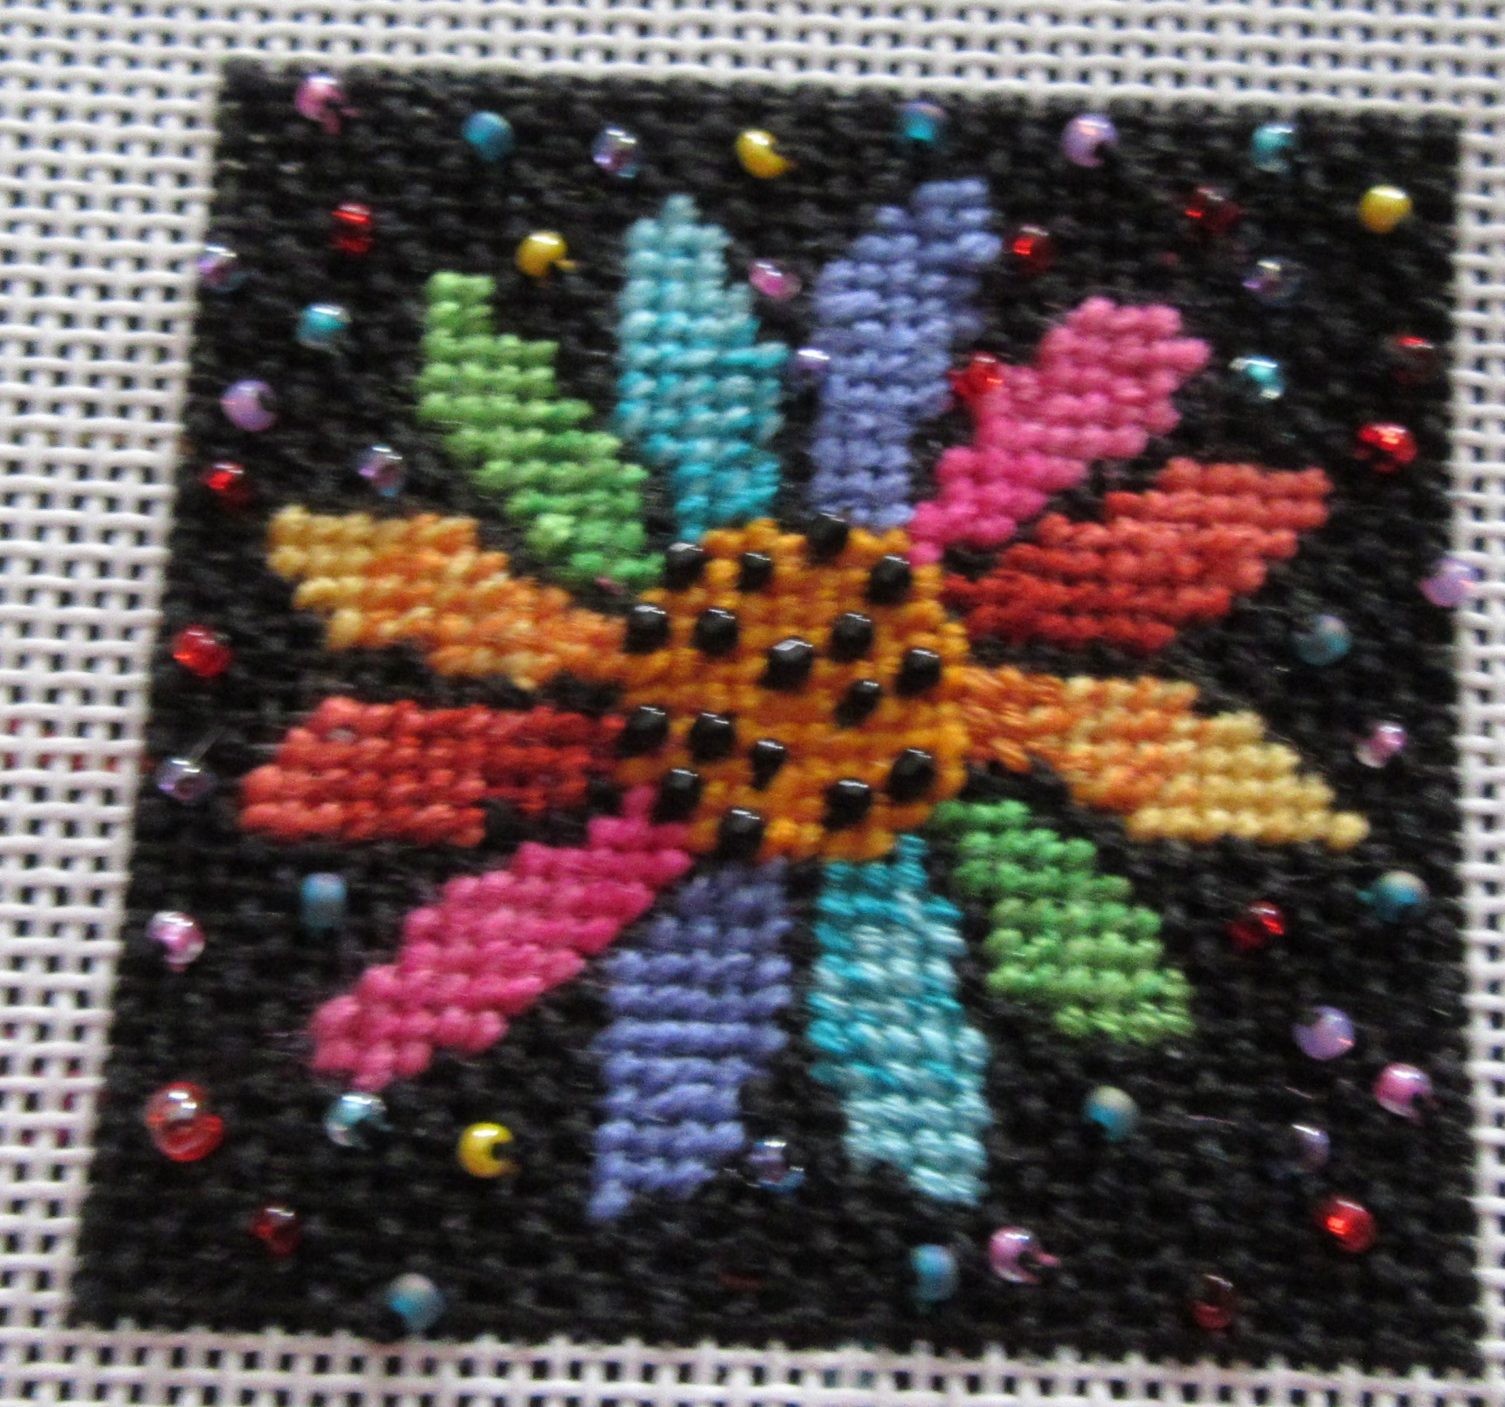
Have you ever wondered just how effective shading can be? You might have been told that it will work with any colors but what does it look like when done?
This delightful shaded daisy from Mindy showcases shading on the petals and lots of beading! Because these techniques are showcased, stitches take the backseat to the many colors of silk and beads.
Materials
- Mindy Mini Daisy needlepoint canvas (#1L)
- assorted size 11 seed beads
- black size 11 seed beads (Sundance color #401)
- Straw Silk 1320 Saffron (yellow-orange)
- Kreinik Silk Mori 1054 (light hot pink)
- City Needlepoint Silk 34 (dark hot pink)
- Needlepoint, Inc Silk 493 (light turquoise), 494 (dark turquoise), 133 (yellow),862 (orange), 533 (dark coral), 866 (dark rust),898 (light violet), 894 (dark violet), 411 (chartreuse), 412 (green)
- Precensia Finca #8 pearl cotton 1393 (back)
Because only a small amount of thread is used for the petals, each color in the petals can be odds and ends of threads. The model uses stranded silk, but cotton floss can be substituted. You can also use other threads, but they must be stranded.
A Note on Beads: Seed beads of any kind can be used. In the background, there is violet (2 colors), turquoise (2 colors), red, yellow, orange, and pink. You might be able to find bead assortments that have most of these colors. Another possibility is to use small assortments like Sundance’s Color Vibe where you can find multiple shades of beads in the package. I used Color Vibe in Caribbean, Fandango, and Scarlet.
Beads come in different finishes and the finish will have a big effect on the final result because the beads are isolated from each other. Beads that are opaque and light, like the yellow here, will show up best. Beads that are dark and more matte, like the dark turquoise, will tend to “melt” into the background. Rocaille beads (clear with color around the hole) also work well. If you are buyiing a multi-color assortment, look for one of opaque beads. If you are using Color Vibe assortments, try to pick the lighter and/or more opaque beads,
Stitching the Daisy
Stitch the background in Reverse Skip Tent, below, using the black pearl cotton.

Stitch the center in Tent using Silk Straw.
The petals are all stitched in Divide & Conquer Shading. This is a method of doing shading with needleblending that makes it very easy to know where to use the blended thread. Each petal is stitched the same way. Both solid colors are stitched first. Following this the blended thread is stitched on the remaining open threads.
That means each petal has three zones going, from base to tip: dark, blended, light. Begin by stitching each of the solid colors. Your canvas will help tell you when the color changes to the intermediate (i.e. blended) shade. Be sure to stitch the solid areas in both petals of each color. Use four strands of silk.
After you have stitched the solid colors, you are left with open threads between them. These should be stitched with a blended thread made up of two strands each of the two adjacent solid colors.
Do this for each of the petals until the flower is stitched.
Lessons on Shading
There are some lessons on shading we can learn from this piece and apply to our other projects.
Use an even number of strands for needleblending. A half-and-half blend will be used most commonly. Starting with an even number of strands makes this easy to do.
Shading gets its power when seen at viewing, not stitching, distance. When seen from 24″ or more away, the colors blend into each other. Even blending two colors, like the yellow/orange petals look seamless.
The closer two adjacent colors are, the more subtle the shading will be. Look at the pink and violet petals — it’s hard to see the shaded area. But on petals where the colors are farapart, like turquoise, the area stitched with blended threads is easy to see.
Adding the Beads
The beads should be added after all the stitching is complete. Use black or another dark color of floss or beading thread to attach the beads; this will help the beads stand out against the black background.
Stitch the black beads in the center first. Add the beads to the background. If you add them color by color your back will be more messy. However, adding the beads by color may make it easier to keep track of your beads.
Come back in two weeks for this month’s Scrap Bag Needlepoint project!
About Janet M Perry
Janet Perry is the Internet's leading authority on needlepoint. She designs, teaches and writes, getting raves from her fans for her innovative techniques, extensive knowledge and generous teaching style. A leading writer of stitch guides, she blogs here and lives on an island in the northeast corner of the SF Bay with her family

Leave a Reply