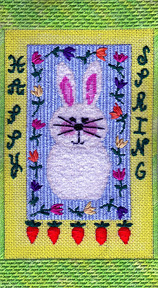
Stitching with furry or fuzzy threads can be a joy because it makes it so easy to create realistic animals. But, on the other hand, stitching with furry threads can be a misery.
The difference? If you use these threads correctly, you’ll get great results. Use them incorrectly and you’ll find yourself picking out the fur or hating the results.
It isn’t hard to stitch with furry threads — you just need to follow these tips to get great results.
- Use short stitching lengths and a needle one size bigger tan the one you would normally use. Both these things put less wear on the thread. The needle opens the canvas holes wider and the short stitching length means the fragile thread goes through the canvas fewer tomes.
- If your thread is thin, bulk it up with matching colors of wool. Furry threads, such as Wisper, don’t cover on 18 with a single strand. However, the hairs that stick out can make two strands difficult to use. By using one strand of Wisper and one of crewel wool you get great coverage with a more workable thread.
- Don’t bother with fancy stitches.I once did a project where I stitched each animal twice both using the same thread and stitch. The difference was I brushed one set after stitching. What I found was that I could not tell the difference between any stitches that were brushed. Tent and Encroached Gobelin are the best choices.
- Maximize the fur on the front of the canvas. You have been told to stitch from a clean hole to a dirty hole. Partly that’s because doing this minimizes the chances of threads from the back traveling to the front of the canvas. When you stitch with furry threads you want the threads from the back on the front. To do this stitch from dirty holes to clean holes.
- Stitch the furry threads last. You should always leave stitching these threads until last. This way those hairs don’t get mixed up in other stitching. To protect your other stitching when you brush, put an index card or area of Press & Seal film over the other parts of the stitching.
- There are many brushes you can use. The easiest brush is your finger or fingernail. If you don’t need much pile brush your finger over the area. This will raise the pile slightly and often is enough. If you need a higher pile, there are many possibilities: clean stiff toothbrushes, Bunka brushes, suede brushes, the hook side of Velcro, or wire brushes. The stiffer the brush you use, the faster the pile will rise & the sturdier the thread needs to be. My favorites of these tools are Bunka brushes and Velcro.
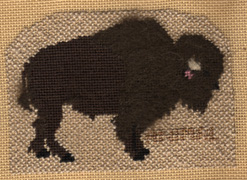
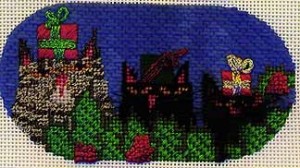
Depending on the thread you use, the resulting pile and look can be quite different. The texture of the result can be different as well. Here are some characteristics of some common furry threads:
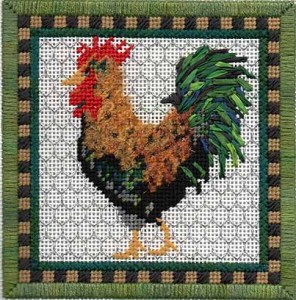
- Alpaca – this Rainbow Gallery thread only comes in natural colors. It’s quite soft and the colors are mostly heathery not solid.
- Angora – from rabbits or goats, this thread is very fine and very soft.
- Fuzzy Stuff – this Rainbow Gallery thread has some clear metallic threads in it, giving it a slightly artificial look. I don’t like it for fur, but I love it for stuffed animals and birds, like the bunny and rooster above.
- Mohair – from goats, the hairs are stiff but fairly long.
- Wisper – another Rainbow Gallery thread, it is about the thickness of crewel wool and comes in many colors. It’s the best all-around choice for furry threads.
Many threads we don’t think of as furry can be brushed to give this effect. All wool can be brushed easily and will retain the characteristics of the wool they use. For example, Cashmere when brushed will stay soft. Some other fibers and threads can be brushed but it might take lots of brushing to get fur. In general, if a thread is soft it probably has fibers that will emerge with brushing. If you want to experiment with this, try a sample first to see how much you need to brush and if you like the effect.
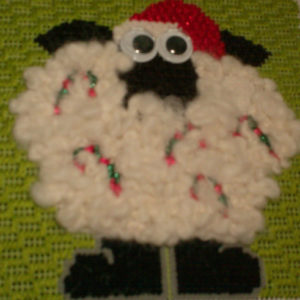
Before we end, let’s take a minute to talk about curly thick thread, such as Fluffy Fleece, used in this Annie Lane sheep. This thread is too thick to go through your canvas holes and its construction is too loose and uneven to be stitched. That means you have to treat it as you would any thread that has these characteristics — couch it!
Here’s how:
Find a very thin wool thread that matches the color of the couched thread as closely as possible. This is important because it’s possible that some of this thread will show. By matching the color and having a wooly texture, these stitches will blend into the couched thread and not be noticed.
Lay one end of your stitching length of the fleece on the canvas at one edge of the area to be covered. Using your thin wool, come out of the canvas, go over the fleece, and bring your needle back into the same hole. Do not pull this stitch so tight that the fleece thread puckers. The couching thread should just attach the fleece thread to the canvas.
Place more of your fleece on the canvas and make another couching stitch. The nature of these threads and this technique is that you do not have to couch in particular lines. Start each new stitching length at the end of the previous length.
Continue in this way until the area is filled. This thread should not be brushed.
With the wealth of furry threads out there you can get great effects easily on everything from furry sweaters to wild animals.
About Janet M Perry
Janet Perry is the Internet's leading authority on needlepoint. She designs, teaches and writes, getting raves from her fans for her innovative techniques, extensive knowledge and generous teaching style. A leading writer of stitch guides, she blogs here and lives on an island in the northeast corner of the SF Bay with her family

Thank you! Your instructions are extremely helpful for a first time user of Wisper.