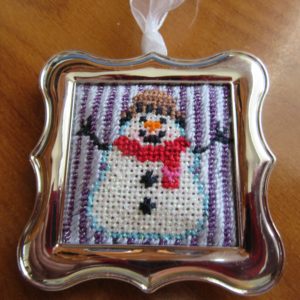
As Christmas draws nearer, we look for great ways we can create distinctive gifts from needlepoint and finish them quickly. For the next few weeks I’ll be looking at great ways your can create distinctive gifts.
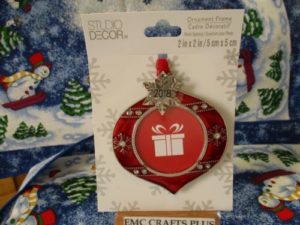
Today I will be looking at a great line of ornament frames that are both elegant and inexpensive and can be found as close as your local Michael’s (they are also available on-line). Studio Design is one of the house brands at Michael’s and they make many of the mini frames you see there (I’ll be talking about them soon). At Christmas they make ornament frames as well.
There are two important differences. First the frames are metal in one of three finishes; shiny, pewter, or shiny with enamel. The second difference is that the ornament frames hang from sheer ribbons from a hole near the top. There is no easel back or hanger.
All the frames have a thin piece of acrylic to be the “glass.” The cardboard back is held in place with plastic tabs. Unlike picture frames, there is very little margin around the visible area.
Almost all the frames come in just a handful of sizes: 2×3 rectangles 2″ squares, and 2.5″ squares and rounds. Some frames have the year inscribed on them. Others have the name on tags, below.

If your have a pair of needle nose pliers it’s really easy to remove the tags.
I have used these frames many times to finish designs, including some Mindy minis and one of theming blue crabs. The size is perfect to finish so many designs. Just off the topic my head I can think of Raymond Crawford magnets, the Painted Pony mini designs pictured above, Rogue Needlepoint rounds of all kinds. Plus, of course twinchies you design yourself or find on this site.
Making the Ornament
To finish these designs you’ll want to trim the canvas very close to the stitching. Remove the everything from the frame. You can discard the paper and acrylic.
Fit the needlepoint into the frame. When you do this, you may find it puffs out some, that is OK. Fit on the back. Put the tabs back in place to secure.
In some cases this does not work because the needlepoint is too thick. When this is the case I discard the cardboard and move the tabs over just the needlepoint. This is not the most secure finish but it will work for ornaments which get little wear.
You could also try substituting thinner cardboard, such as chipboard from cereal boxes, or try prying the tabs out a bit.
Because of the silver and enamel, these frames make sparkly additions to your tree, even if the needlepoint does not sparkle.
I’m off to look for my stitched but unfinished box of ornaments to finish some more with the frames I ordered yesterday.
About Janet M Perry
Janet Perry is the Internet's leading authority on needlepoint. She designs, teaches and writes, getting raves from her fans for her innovative techniques, extensive knowledge and generous teaching style. A leading writer of stitch guides, she blogs here and lives on an island in the northeast corner of the SF Bay with her family

Leave a Reply