I’ve been trying to conquer beading at long last, after many, mostly futile, attempts. In the process I have learned many things that have made it easier and helped me to do this more easily.
The last couple of days I have struggled with using some very inferior beads and this has helped me consolidate what I’ve learned.
Make sure your beads are the right size. If the beads are just an accent and placed singly, you can use any size, but if your beading will be in a row or solid, your size must match the canvas size. Size 11 beads work on 13-mesh. Size 15 (or “petite”) work on 18-mesh. If you use 11’s on 18-mesh you must bead on alternate intersections or have your beads bunch up.
If you need lots of beads, consider buying them at a bead store. Beads sold in needlework shops are repackaged versions of the same beads sold in bead shops in larger quantities. If you need lots, and I mean more than about 500 of a color, buy from a bead shop, you’ll get more and pay less.
Always use glass seed beads. Some seed beads, especially inexpensive ones sold in craft shops, are plastic. You can’t always tell this. But touch an iron to a plastic bead and it melts, ruining your piece. (Thanks to Cathe of Needle in a Haystack for this tip.)
Use tapestry-point beading needles. Traditional beading needles have two huge disadvantages for needlepointers: they are very long and very sharp. Several years ago John James came out with these needles. They are still very thin, but their points are blunt and they are short, about the length of a #28 tapestry needle. If you have hated beading with the traditional needle, try these.

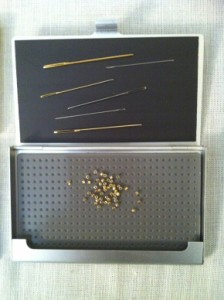
Have a secure place to store a bunch of beads while you add them. Many companies make different solutions to this and you can also make your own. Being able easily to catch a bead on your needle instead of chasing it or picking them up one at a time will make beading go quickly and be more enjoyable. My favorite is Accoutrement’s beading case. I can close it securely with beads inside it and put it in my project bag and the magnetic side gives me a place for threaders and needles (read my review).

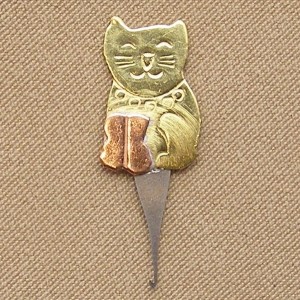
Use a thin wire or micro-hook needle threader. You will need a threader because the eyes of beading needles are very thin. The threaders you normally use will not go through these eyes. You must use something small. Cheap threaders for hand-sewing, not embroidery, work and are cheap, but they tend to break. My favorite threaders are the micro hooks from Puffin (read my review here). I keep them in my beading case.
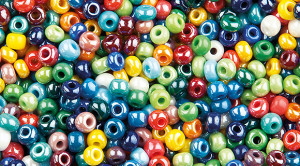
Not all seed beads are made equal. The biggest problem with seed beads is that the holes are not consistent. The lower the quality of the bead, the more likely this is to occur. In one color of beads for the project I’m doing, I have thrown out over 80% of the beads because the holes were too small to get over my needle.
Happily, the company has upgraded the beads they use, but initially they were not careful about this and it no doubt frustrated many stitchers. I have rarely used a bead where there weren’t a few that were flawed but any reject rate higher than 1 in 15 or 20 is a sign of poor quality.
The highest quality beads are Miyukis and Delicas, both from Japan. Next highest are Czech. You can learn more by reading my articles talking about beads in more detail (here, here, and here) plus this great article from Fire Mountain.
Finding the right beads and using the right tools can turn beading from something to be avoided into something to love. With luck tomorrow we’ll look at the same canvas done in beading and two alternatives.
About Janet M Perry
Janet Perry is the Internet's leading authority on needlepoint. She designs, teaches and writes, getting raves from her fans for her innovative techniques, extensive knowledge and generous teaching style. A leading writer of stitch guides, she blogs here and lives on an island in the northeast corner of the SF Bay with her family

Japanese beads are much nicer, more uniform in shape, and keep their color if silvered inside the bead.