Updated December 10, 2021.
Call it T Stitch, T’s Stitch, or Alicia’s Lace, this little Tent Stitch variation is my favorite stitch. You can use it so many ways:
- a great background (see below)
- a fast alternative to Tent Stitch
- a fun textured stitch for small spaces
Making T Stitch
You can make T Stitch in straight lines, diagonal lines, or a hybrid of the two. You can make it in one pass or two. In general, this stitch has a back that looks like the front, Tent Stitches in alternating directions.

Remember that with this stitch, you’ll be skipping every other thread on each line. That means the ALL your stitches will be over one kind of intersection: either horizontal threads on top or vertical threads on top. Making the stitch on horizontal threads is slightly higher.
Diagonal One Pass – In this method, you make each stitch in a single diagonal row at one time. Begin by making the first stitch in the row. On the next diagonal intersection, make the stitch slant in the opposite direction. Then back to the first direction on the next intersection. And so on.
Unlike the other methods of doing T Stitch, this does not have true diagonal stitches on the back. Instead, the stitches are straight stitches over 1 thread or oblique stitches, depending on the path from stitch to stitch. This makes T stitch done in this fashion look slightly oblique. It also makes it more likely to distort the canvas.
Diagonal Two Passes – Begin this stitch by making all the stitches that go in one direction in diagonal rows. Going along a diagonal, this would be an “over 1, under 1” pattern.
Once complete, make all the stitches in the second direction, again using the “over 1, under 1” pattern.
Like most stitches made in diagonal rows, you’ll end up with long rows at opposite corners.
Straight Lines One Pass – You will make each stitch in one row, all the way across the canvas, then follow it with the stitches in the next row, which slant in the opposite direction.
This is the method I use the most because I find it both relaxing and very fast.
Hybrid is a combination of the first pass of the diagonal method with a second pass in the Straight Lines method. Your first direction will be made in diagonal lines. Once this is completed, fill in the second direction in straight lines.
The back of this stitch will look like the back of the two-pass diagonal method.
All these methods are about the same in terms of thread use and wearability. You can do any of them and the results look the same on the front of the canvas. Even so, do not mix methods in the same area of the same canvas. Pick a method and stick to it.
T Stitch as Background – Some Ideas
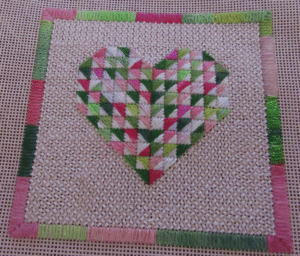
Use a matching thread to add texture not color. I often use this when I want to stitch a paper-like background. It’s especially nice in slightly textured threads, such as linen, or in hand-dyed threads that have a subtle texture.

Use a slightly different color to change the background color. Because T Stitch gives pretty good coverage for an open stitch, you can use it to modify a background color you don’t like. Pick a thread color that is close to your desired result (brighter, darker, duller, lighter, or an entirely different color) and use that. Yes, the existing canvas will show, but the end result will be mostly a tweeded version of your chosen color.

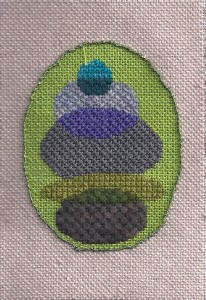
Use it to make a needlepoint “mat” around a design. If you have an oval or circular design and want to put it into a rectangular frame, draw out the rectangle and fill the open area with T Stitch. If you add a decorative stitch around the oval or circle, the T Stitch will look like a mat.

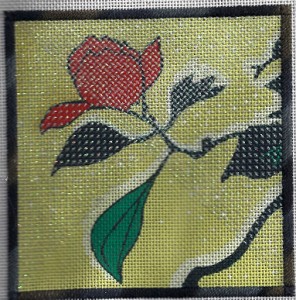
Use a very thin shiny thread to give the effect of water. This is an adaptation of a dede Ogden technique. She uses her Prism thread and Skip Tent. But you could also use blending filament or Sparkle Braid. The coverage is more with T Stitch with a similar effect. It’s stunning and really shows off the shading on the painted canvas.
Use it to create “glass.” In a blog post awhile back, I showed you how T Stitch and white Nordic Gold combine to make great glass. You can use this stitch not only for backgrounds but to cover an entire canvas.
There are so many great ways to use this stitch, I hope you’ll have some fun with it. In the comments section, let me know about other ideas you have for using T Stitch.
About Janet M Perry
Janet Perry is the Internet's leading authority on needlepoint. She designs, teaches and writes, getting raves from her fans for her innovative techniques, extensive knowledge and generous teaching style. A leading writer of stitch guides, she blogs here and lives on an island in the northeast corner of the SF Bay with her family

Leave a Reply