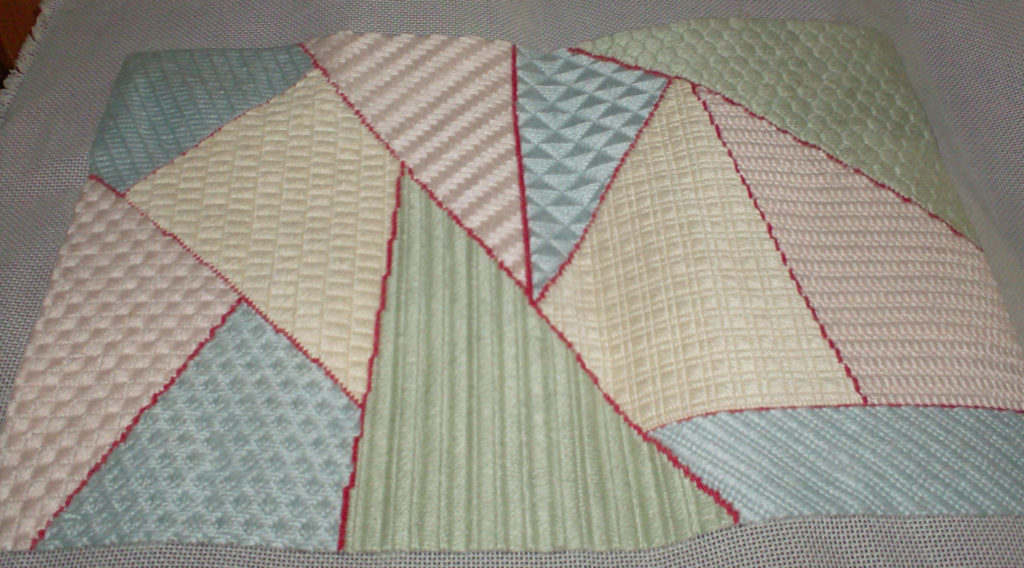
Today we start a new free project, Yoshigiri Needlepoint Stitch Sampler. Based on Japanese crazy quilt patchwork, this sampler features simple stitches in a pastel color scheme accented with red. There are ten patches in the rectangular project.
Crazy Quilts
Crazy quilts were extremely popular in the Nineteenth Century. Consisting of irregularly-shaped pieces of fabric, often they were further embellished with embroidery on the patches or with embroidered seams.
Theses quilts were more decorative than for warmth and were generally made from dress and luxurious fabrics. As a result, they were more likely to be seen in the parlor than on a bed. They remain popular today as a showcase for lovely embroidery.
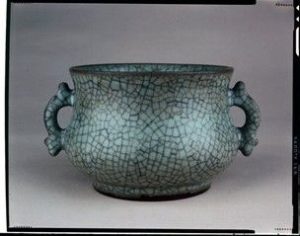
The name “crazy” quilt comes not from being insane, but from “crazed” pottery where the glaze has intentional cracks in it, breaking the surface up into small irregular areas, as in the picture below.

As part of the craze for all things Japanese in this period, crazed Japanese pots came to the West, inspiring these over-the-top quilts.
Japanese and Korean Quilts
This pottery didn’t just inspire stitchers in the West, it also inspired needleworkers in Japan. While American-style patchwork was unknown in Japan until the last half of the Nineteenth Century, crazy quilts with irregular patches were made.
Japanese quilting, or boro, is thought to have originated with a type of peasant clothing that sewed together scraps of clothing in what we would call a crazy quilt style. Although Western-style quilting is very popular in Japan, boro is still a treasured folk art.
Korea also has a crazy quilt tradition called Poljagi. Often it too has irregular patches, but it has other aspects that influenced this design.
- The seams are very important and are often stitched in a different color.
- The color schemes are very pale unlike Japanese boro which often uses indigo fabrics.
Materials Needed
To make this sampler you will need:
- 17×13 18-mesh mono needlepoint canvas
- 1 skein each of five colors of silk & ivory four patch colors plus one seam color
- permanent marker made for making fabrics
- ruler
For my quilt I used: Really Red (11) for the seams and Blue Yonder (106), Cucumber (99), Pink Lemonade (111), and Lemon Ice (6) for the patches.
Similar threads such as Vineyard Silk, Duchess Silk (Gloriana), or Planet Earth Silk can also be used.
Marking the Canvas

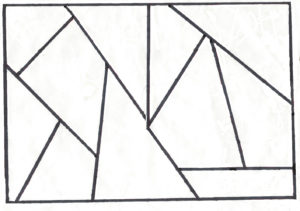
Print out the outline (it should be about 5×7). Enlarge it to 200% and print it. This may take more than one piece of paper. If it does tape them together to make a single pattern.
Put this under your canvas and trace over the black lines only to mark your canvas. The outside edges of the design should each be on a single canvas thread. Use your ruler to make all the inside lines straight. Only vertical and horizontal lines should be along a single thread.
Let dry overnight.
Stitch over the lines inside the design in Continental using your seam thread.
Come back in two weeks for the first patch in this lovely project.
Next week a new series starts every other Tuesday, Blog Stitching. You’ll see my current projects and learn about how they are stitched.
About Janet M Perry
Janet Perry is the Internet's leading authority on needlepoint. She designs, teaches and writes, getting raves from her fans for her innovative techniques, extensive knowledge and generous teaching style. A leading writer of stitch guides, she blogs here and lives on an island in the northeast corner of the SF Bay with her family

[…] Yoshigiri Needlepoint Stitch Sampler – 1 freebie(s)? […]