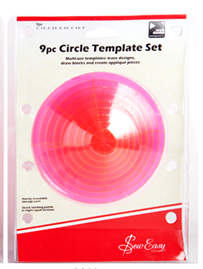
Centering rulers are perfect if you are making squares or rectangles, but they don’t work for circles. Depending on whether your canvas is stitched or unstitched, you’ll need one or two easy tools to make perfect circles for your needlepoint.
To begin you will need a set of round transparent acrylic templates. I like these Sew Easy templates (reviewed here). Whatever template you use, it should have the center point marked.
You will also need an extra-fine permanent marker safe for fabrics (I like Pigma Microns).
Begin by measuring the needlepoint to find the size you want to use. Pick that circle out from your template set. If your needlepoint is already stitched, you cannot mark the center. Find it visually and remember it. Place the center of the template on top of the center of your needlepoint. Draw the circle with your pen and remove the template. You’re ready to stitch! Begin by using your centering ruler to find the center of your canvas. Mark this with your pen. Place the center of the template on top of the center of your needlepoint. Draw the circle with your pen and remove the template. You’re ready to stitch! Isn’t this easy? As long as you have templates that you can see through and that have centers marked, you can use this process to find the center and make an outline for any shape. When you shop for templates, look for sets for quilting and scrapbooking; these are most likely to be in sizes and shapes you’ll need. Janet Perry is the Internet's leading authority on needlepoint. She designs, teaches and writes, getting raves from her fans for her innovative techniques, extensive knowledge and generous teaching style. A leading writer of stitch guides, she blogs here and lives on an island in the northeast corner of the SF Bay with her familyAbout Janet M Perry

Leave a Reply