Updated June 19, 2020.
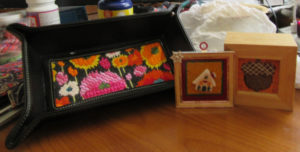
Lee makes a number of different leather snap trays. The orginal was square and held a 3″ round canvas. There are also rectangular, a larger square, and round ones. All are similar in construction and finishing. I have several of them and use them for many different purposes.
The colors available are:
- Small Square: navy, brown, dark green, red, and white
- Large Square: black, silver, red, aqua
- Rectangle: black, silver, red, aqua
- Round: black and brown
Leather on both sides, they are just beautiful. For people who are looking for a different way to finish small needlepoints, these are great. Except for the round tray, which has eight snaps, the trays have four sturdy snaps, one at each corner. They can be stored or sent flat which makes them great for mailing. I recently sent a rectangular tray to my daughter in a flst rate envelope.
Like the other LNA products they have a two-sided adhesive protected by paper. Remove the paper, put your needlepoint on and tuck the edges under. A lovely product you can finish yourself.
Unhappily while this process works, the snap tray is more challenging to finish than any other Lee product I have used. That’s because at the middle of each edge the overlap is extremely small. by making the bottom just a little but bigger, may 1/8″ all around, there would be enough room to tuck the needlepoint in securely. Rather than using your finger, this pricess goes very smoothly if you use a Cricut spatula.
The problem, I’m afraid is one of geometry. When a circle is placed inside a square there will be little room on the sides and lots of room at the corners. This will always happen, but if the square is larger than the circle’s diameter, fitting will work better.
As it was I had to trim exactly at the edge of the stitching to have the slightest hope of it fitting. the needlepoint needs to be centered exactly and I needed to really work to tuck everything in. The rectangular tray and the round tray have more generous margins so the canvas needn’t be trimmed as closely.
It’s easiest if you start with a side and work in a circle. This will make the sides easier to fit in.
The corners, while there was more overlap, were still difficult to tuck in with my fongers. In addition to this difficulty the leather stretched slightly because I had to work so hard to fit the needlepoint. It’s just enough that I will need to glue it down, something I’ve never had to do before. The silver leather is more prine to this. If you do not want to glue, weight the flat tray under a heavy book for a day or two.
Because the edges of the needlepoint will be under the leather don’t put embellishments near the edge of your stitching, nothing nearer than 2-3 stitches in. Although many needlepoint stitches won’t be harmed by cutting close be careful if you use pattern darning or other loosely fixed stitches. You may want to fix them by making a line of backstitch around the very edge.
I love the idea of these elegant leather trays. In spite of the challenges of the square trays, these are fantastic!
About Janet M Perry
Janet Perry is the Internet's leading authority on needlepoint. She designs, teaches and writes, getting raves from her fans for her innovative techniques, extensive knowledge and generous teaching style. A leading writer of stitch guides, she blogs here and lives on an island in the northeast corner of the SF Bay with her family

Leave a Reply