Stuck at home? Looking for something you can both stitch and finish in one evening? Or do you want to give a quick project for a stitching friend or encourage a beginner to stitch?
Make your own mini kit. It’s really easy to do. The components of your mini kit will be:
- two sets of 4″ stretcher bars
- 4″ square 18-mesh mono canvas
- size 20 or 22 needle
- 2″ square mini frame (oftem Michael’s has them for great prices
If you are giving this as a gift, add a pretty project bag, an inexpensive pair of short scissors, a threader, and a needle minder. If you are stitching for yourself, add these things from your stash.
The first step is to find a picture that is no bigger than about 1.5″ square. Look for emojis, simple silhouettes, or pretty monograms, icons, or symbols. Resize your picture and trace the design onto your canvas with an extra-fine marker such as a Pigma Micron. Once your design is traced, center the design and outline the finished size around it. Use the glass from the frame as a template for this. Many of the kits you buy have exactly these kinds of designs.
Now that you have your design pick out your threads. Pearl cotton is great for beginners, embroidery floss for more experienced stitchers. If you are stitching from stash, pick any threads you like. Remember, with small spaces, you can easily end up having too much texture or sparkle in your thread. Tape the canvas edges with artist’s tape.
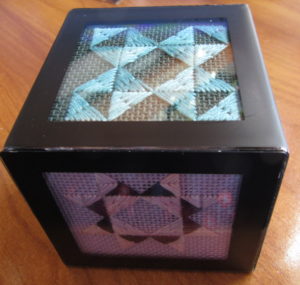
You can also do this with many painted canvases. I’ve stitched two-inch square needlepoint include the Hummingbird House mini canvases from Danji, the Mindy minis (free stitch guides on this site), and small designs by Melissa Shirley. I love doing needlepoint this size and have also created monograms and Bargello patterns this size. The mini picture cube pictured here has six quilt block designs this size.
Simple stitches work best. Print out stitch diagrams for the stitches. Think about using simple patterns such as stripes or checks for backgrounds.
Once your design is stitched, cut out the needlepoint two threads beyond the stitched area; this will be bigger than you need. Remove the backing, glass, paper, and anything else from inside the frame. Test fit the needlepoint and trim one thread at a time on opposite sides until the needlepoint fits the frame.
If you plan on using the glass, clean it and put it into the frame first. Add the needlepoint. Put on the back and refasten.
Mini frames also come in other shapes, such as rectangular or round. You can follow this same process to make mini kits in other shapes.
Congratulations! You just completed an original needlepoint mini kit.
About Janet M Perry
Janet Perry is the Internet's leading authority on needlepoint. She designs, teaches and writes, getting raves from her fans for her innovative techniques, extensive knowledge and generous teaching style. A leading writer of stitch guides, she blogs here and lives on an island in the northeast corner of the SF Bay with her family

Leave a Reply