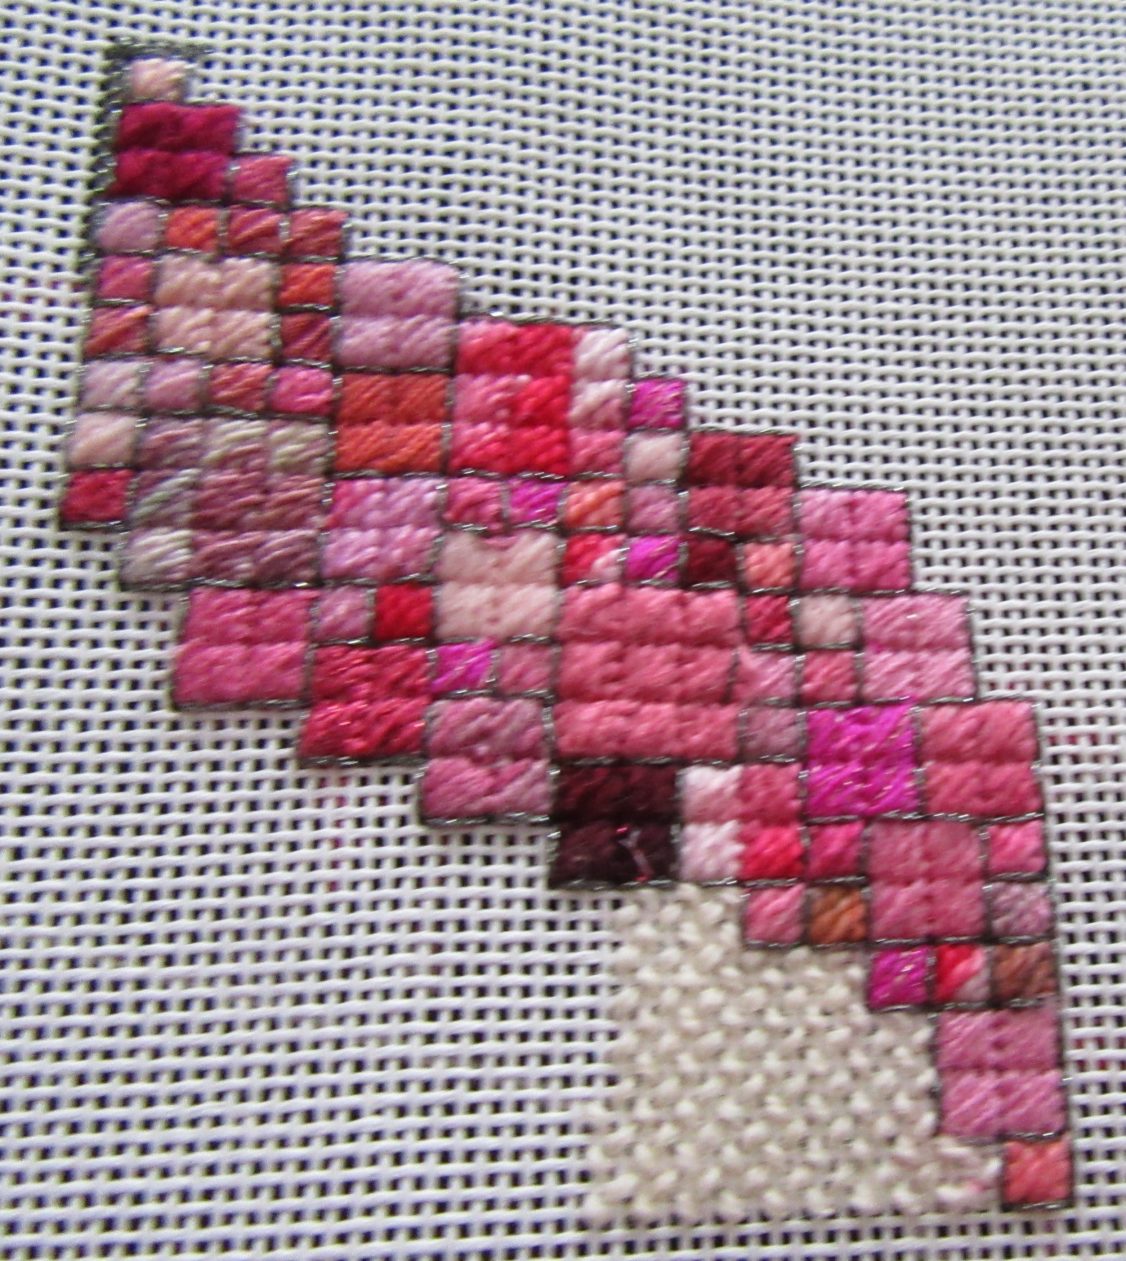
This month’s free Scrap Bag Needlepoint is a perfect small project when you have plenty of scraps in one color. The design is based on a quilt and has a lovely sweep of squares in three different sizes in shades of a single color. How to pick your threads is explained in the next section.
For the project besides the threads in your main color, you will need:
- 18-mesh mono canvas 7×8″, finished size is 3×3.5″
- 1 package 8-strand metallic in outline color
- 1 package background thread
Threads and Color
The tough thing about making a project using threads in a single color is creating variety. If the threads are close to the same value, even if the colors look different, visual “holes” in your design can form.
The best way to avoid this is to pick many threads, far more than you are likely to need. As you pick the thread for each square, consider the colors around it and pick a thread that has a contrast in value.
You can use overdyed threads for this project. If you do, they will blend in best with the monochrome color scheme if they are monochromatic themselves or use adjacent colors. I used threads of both types in the project.
Because this is done in a single color, you will probably need to supplement your scrap threads with threads from your stash. If you do, be sure to keep them separate so you can return them to your stash.
Threads with a variety of non-metallic textures can be used. In the model I used silk, wool, floss, silk/wool blends pearl cotton, matte cottons, and silk/metallic blends. As you can see, this variety makes the piece look more “scrappy” but allow the outlining to stand apart.
Your metallic should be a dark color that will stand out nicely against your main color. Your background should match the canvas color.
Stitching
The design is made up of squares in three sizes: 3×3, 6×6, and 9×9. I stitched them all in Scotch Stitch, below. The larger squares were assembled from multiple Scotch Stitches.
Follow the map below to stitch your ornament, beginning in either the bottom right or top left corner. The map is created to make the design easier to follow. In order to make it less confusing one square on the map is one Scotch Stitch in the project.
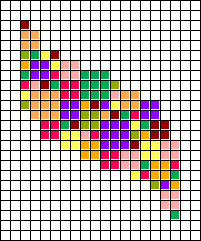
As you progress through the piece, outline each square with the metallic. These are Straight DStitches, going over two threads that run in the ditch between stitches.
When the colored swoop is stitched, add a Tent Stitch border around the design. Fill in the background in below.

Alternate Stitch Choices
You’ll get better definition of the three square sizes if you stitch them in different stitches. Continue to use the basic Scotch Stitch for the squares that are 3 threads square. For the 6×6 squares, use Reverse Genny’s Scotch, below. This variation divides up the longer stitches and stitches the square in the opposite direction to add variety.

For the largest squares which cover 9 threads, use Genny’s Scotch Variation, below. Here with even longer stitches, the divided stitch pattern is more complex.

When you use three different stitches you may find the outlining is too much; it can be left out. You will, however, want to outline the project in Tent Stitch using the metallic.

About Janet M Perry
Janet Perry is the Internet's leading authority on needlepoint. She designs, teaches and writes, getting raves from her fans for her innovative techniques, extensive knowledge and generous teaching style. A leading writer of stitch guides, she blogs here and lives on an island in the northeast corner of the SF Bay with her family
Love this! I think it will work up beautifully.