Sometimes when you have two dyelots, the difference between them is subtle. If you are careful about where you place the two dyelots, you can make it so that the change is barely noticeable. If you are not careful and place the two dyelots next to each other on the same area, the change will stick out.
That’s the essence of the dyelot problem. You might think that it’s a small thing and therefore will not be noticed but, as my DH’s grandmother would say: “If it was on the end of your nose . . .”
The solution is to plan out your stitching, so that it looks as if you meant the stitching to look the way it does.
The Basic Solution
This solution for the dyelot problem requires that areas using the same thread be distinct from each other. If the areas are separated by other colors, the appropriateness of this solution is easy to see.
In this case we see another kind of separation. An overall outline is divided by horizontal bars throughout. That means that some or all of the outline can be separated from the other areas. If the stitches in these areas can have different directions, the separation is even clearer. The areas are separated by their direction so that even if two areas meet, they will be seen as separate.
The Application
On a canvas where you are placing different dyelots in different areas, begin by considering how much thread you have. In many cases you can use the two dyelots in different numbers of areas or you can divide the area to be covered up differently.
Whenever you are using this strategy, be sure that you have enough thread for an area. If you are stitching separate areas and you must change dyelots in the middle of an area, cut it out. It’s a better strategy to have some leftover thread for your scrap bag. Changing dyelots in the middle of an area just highlights the problem you are working to solve.
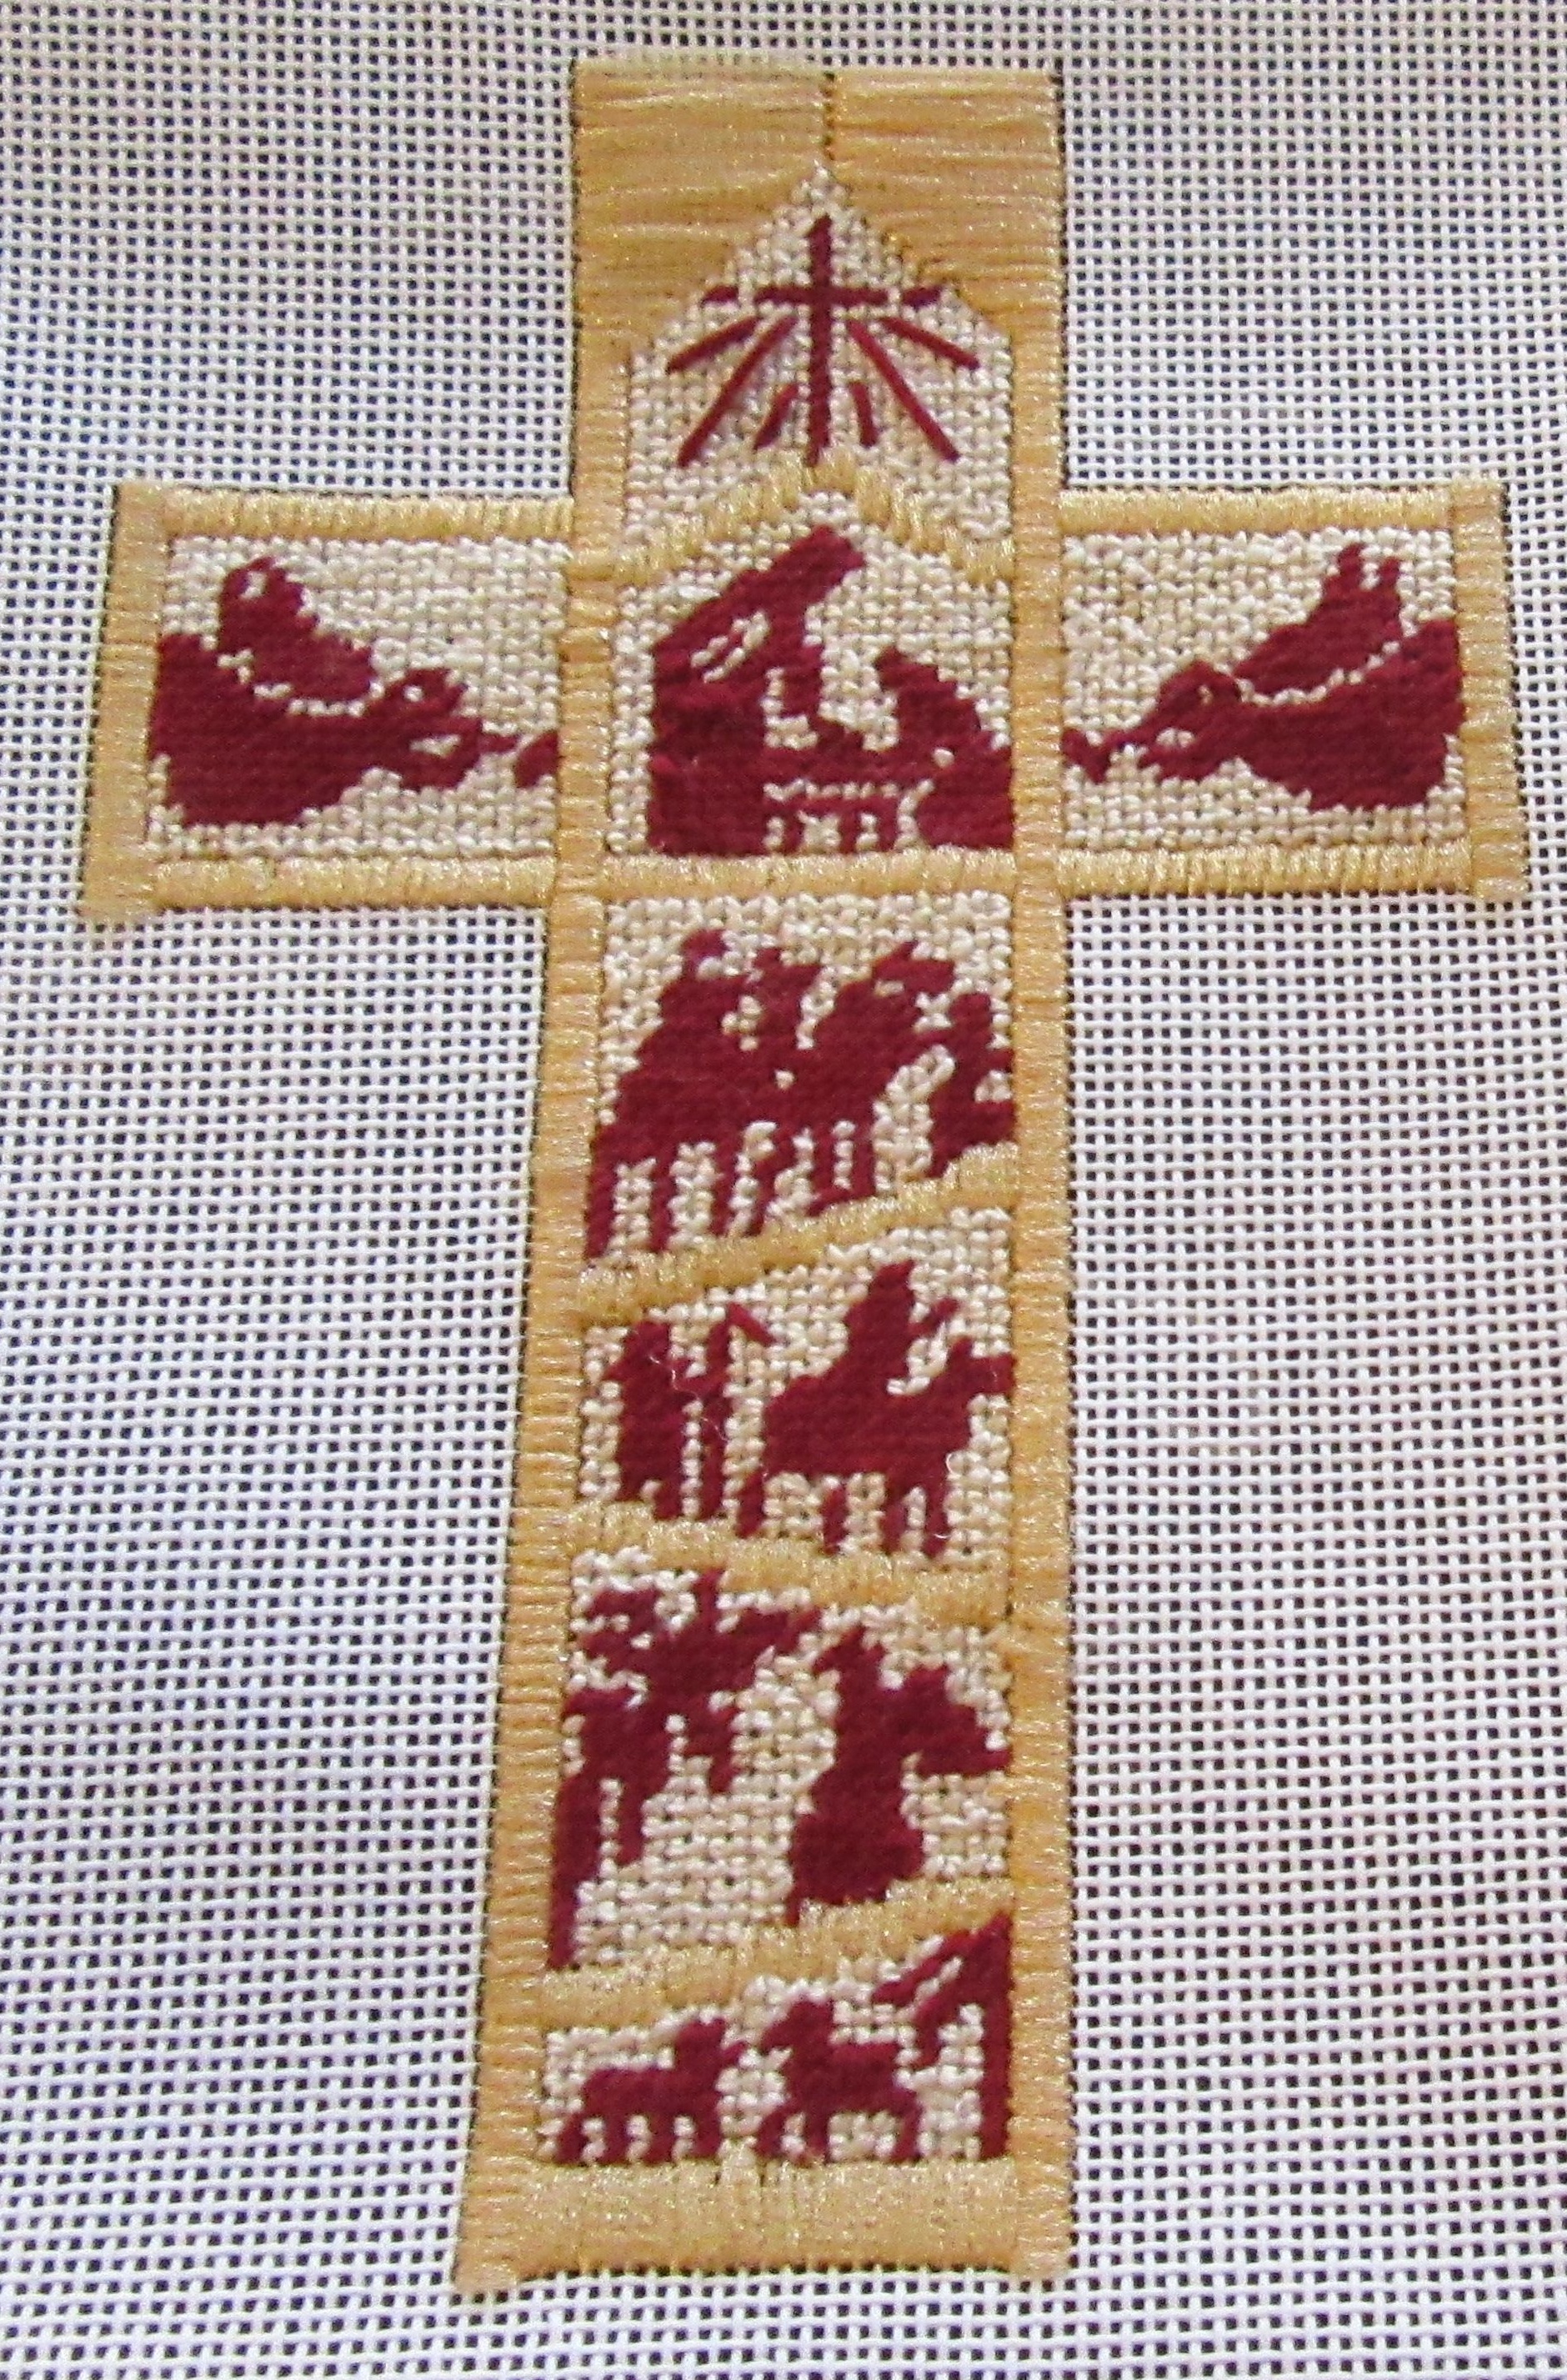
In stitching this cross I knew that I wanted to separate some, or all of the outline, from the dividing lines. I didn’t think I had enough thread in either lot to do the entire outline, so the long vertical area was done in one lot. The remainder of the cross was stitched in the second lot.
Corners when stitched with Upright Gobelin can be either mitered or lapped. Mitered corners by creating diagonal lines and having stitches from adjoining sides meeting along those lines, had plenty of opportunity to highlight the change.
Lapped corners have one direction going straight through. By choosing this method, I could create a clearer distinction between the two areas, thus masking the dyelot change with the more obvious separation by direction. To emphasize the vertical direction of the cross, these lines go through.
I stitched the vertical outline first and ran out of this dyelot. If I had had slightly more I would have stitched the vertical lines on the ends. Slightly more than that and I would have stitched the horizontal ends instead. If I had plenty of this dyelot, the entire outline would have used it.
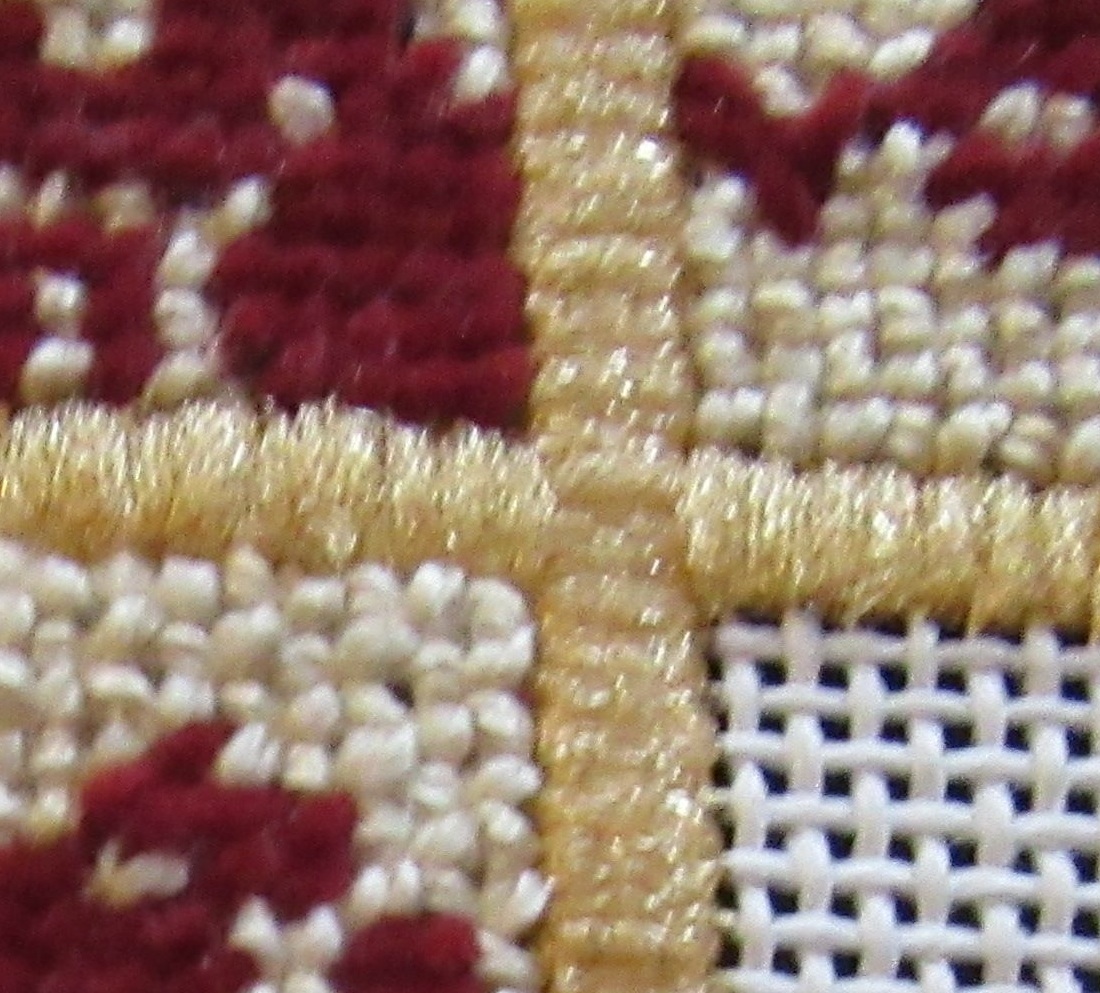
Once the vertical outline was finished I stitched both ends of the crossbar and the horizontal lines. As you can see by the detail picture, the dyelot difference is subtle. We know because of this article that it is a dyelot difference, but if I had not told you — could you tell?

About Janet M Perry
Janet Perry is the Internet's leading authority on needlepoint. She designs, teaches and writes, getting raves from her fans for her innovative techniques, extensive knowledge and generous teaching style. A leading writer of stitch guides, she blogs here and lives on an island in the northeast corner of the SF Bay with her family
Leave a Reply