Updated April 17, 2020.
If you have a collection of buttons or earrings that have lost their mates, have sturdy scraps or embellishments from scrapbooking, have guitar picks, campaign-style buttons, cabuchons, or if you haunt thrift shops looking for pretty little things, turning them into stitcher’s magnets is one of the most fun things you can do.
With good glue, embellishments, and a couple of magnets, it only takes a few minutes to make enough magnets for every project.
I’ve made my own stitcher’s magnets for years and I want to share with you what I’ve learned and give you instructions for making your own. Making magnets and finding treasures to turn into them is addicting. You’ll love howeasy they are to make and how fun it is to pick the perfect magnet for your project. My current project is using a magnet made from a dollhouse-size copy of The Hobbit.
Magnets
You can find inexpensive magnets that are black at your local craft or office supply store. I know from bitter experience that they are not strong enough. Even though they might hold together when they are in your drawer, they do not stay together on the canvas and sometimes they will not even hold a needle.
It’s far better to use rare earth magnets. They are silver and come in many sizes and thicknesses. The bigger or thicker they are, the stronger. Sometimes so strong you can’t pry them apart but have to slide them.
I have better luck with a smaller, thinner magnet 8 mm across (about 1/4″) and 1-3mm thick. I can pry these apart. I buy mine on ebay, but they have become more widely available recently. Your magnets don’t have to match in size. The front magnet should be as big as possible to fit the size of your decorative front. The back agnet can be smalle to make for easy removal.
Embellishments
There are two factors to consider when buying embellishments: size and material. They should not be smaller than your magnet. They can be bigger but the area bigger than the magnet will not be magnetized.
Your embellishment needs to be made out of something strong enough that it will not bend with use. This means that the only paper things you can use should be made from thick cardboard. Otherwise they just don’t last. If you coat or laminate your paper it may be strong enough. Other ideas to strengthen paper include putting it under resin or using it on a button form or bottle cap.
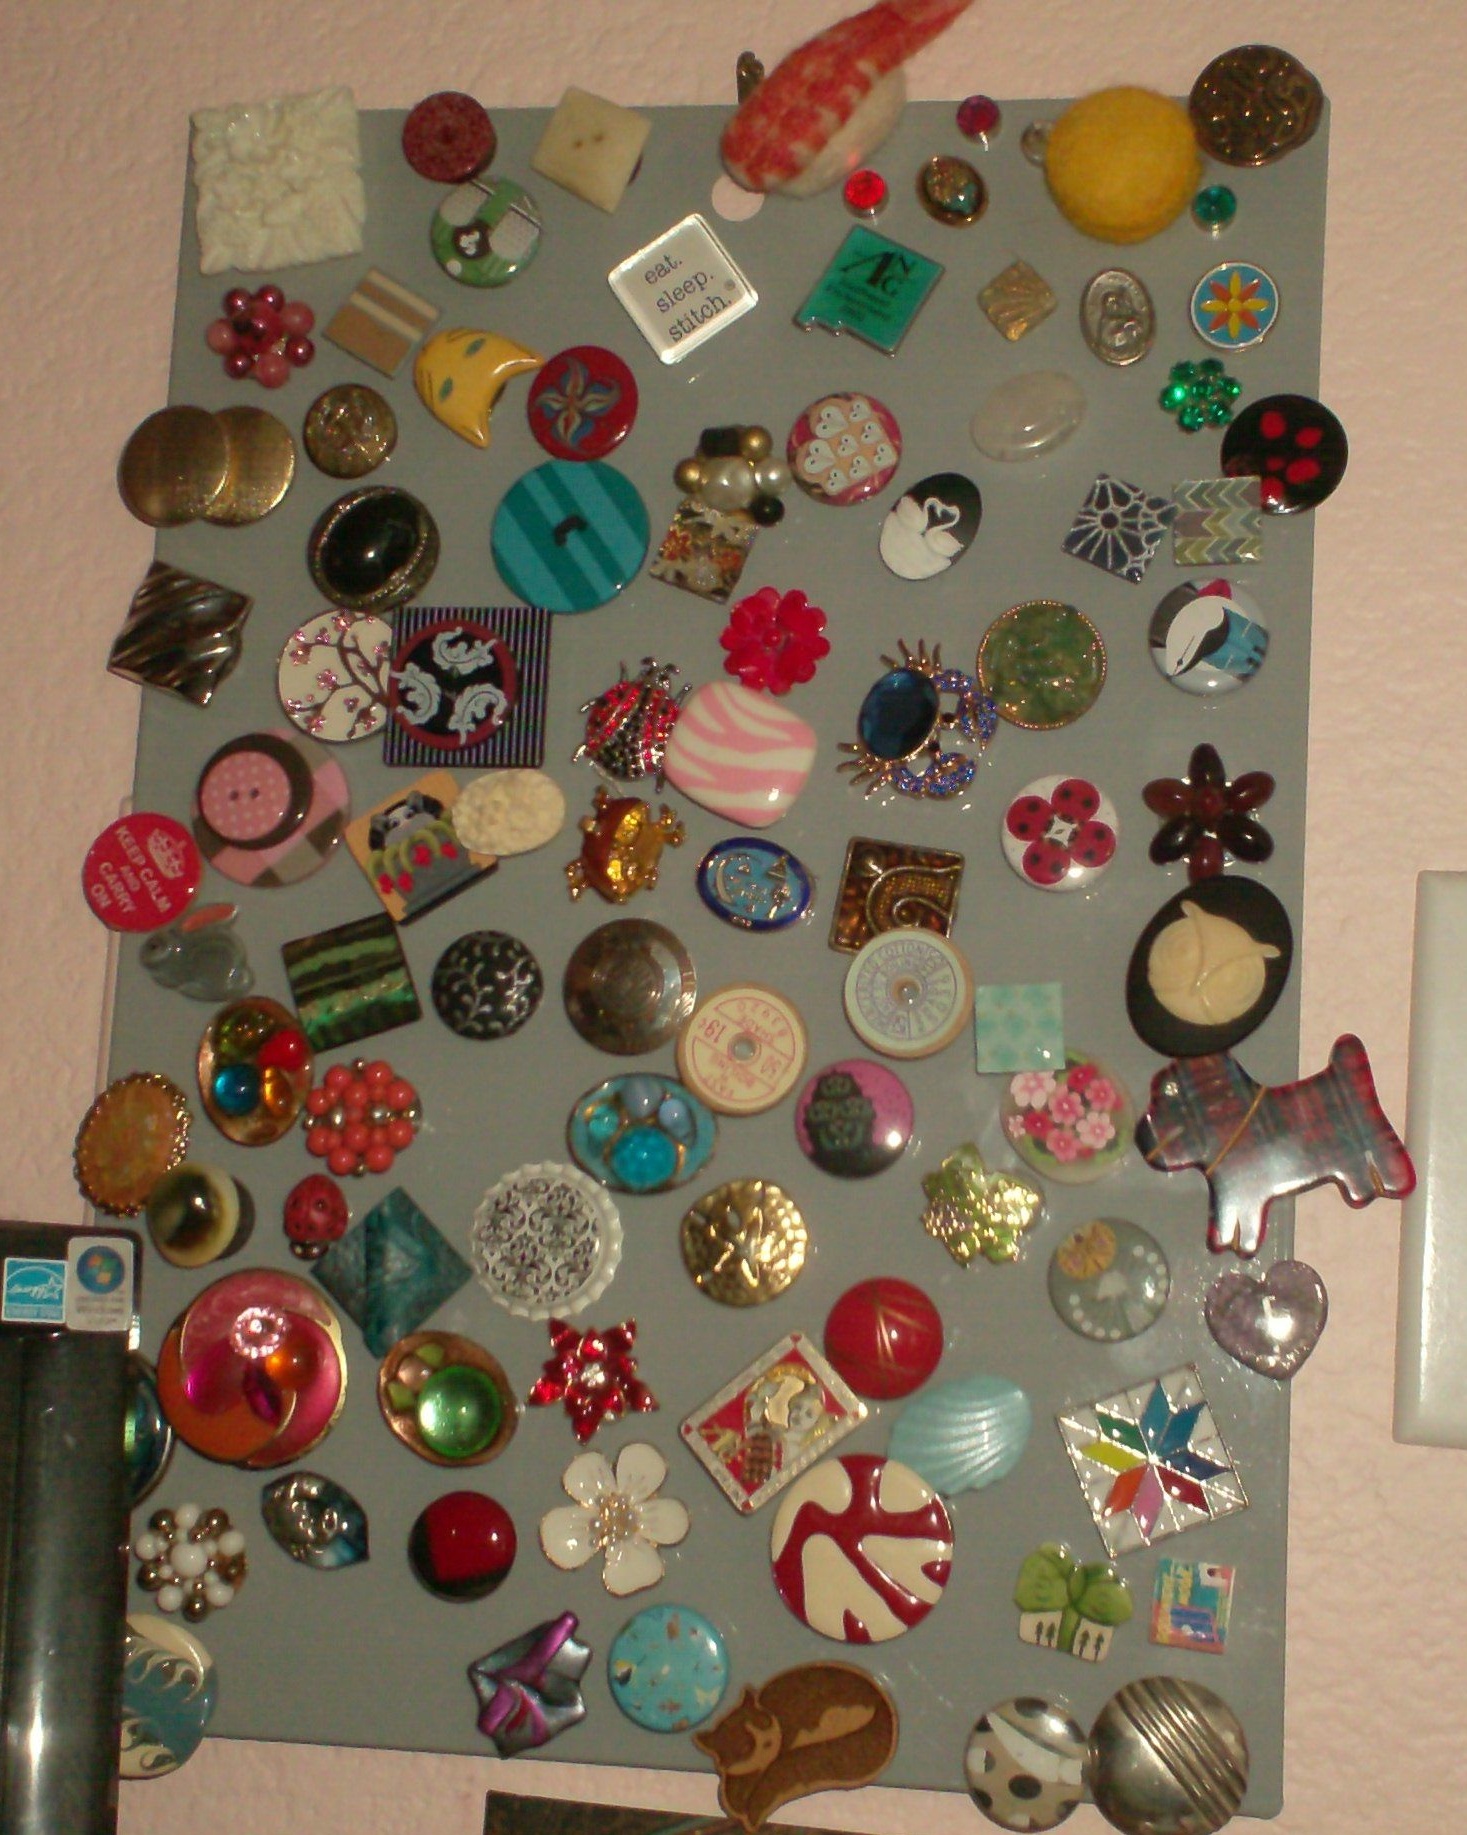
I’ve used magnets made from felt, cloth, plastic, horn, metal, shell, and ceramic. Almost everything is from thrift shops (good source for big 80’s earrings that are perfect here), my own single earrings, or my button jar. I rarely have two that are the same.
Glue
There are two types of glue I recommend for these projects because they are very strong, easy to use, and dry clear.
The most widely available is some type of Super Glue. These glues are all similar in composition and can be found anywhere.
The second glue is ES-6000, a glue widely used in jewelry making. It is thicker than crazy glue and you need to use more of it. It takes longer to dry, but wears like iron. It comes in big tubes and can be found most places where you would find jewelry making supplies. I have also found it recently in packages of three small tubes. This is perfect for making your own magnets.
Do not under any circumstances use white glue or glue dots you find in craft stores — they are not stronmg enough for this job.
Step-by-step
- Begin by preparing your materials. Make sure earring and pin findings or button shanks are removed (use safety goggles when doing this).
- If you want to be sure your magnets stay together, cut a narrow piece of 1/8″ satin ribbon and glue each end to one of the magnets. Let dry.
- On the ribbon side, if you used it, glue the embellishment onto the magnet. Let dry overnight and use.
I love my magnets. THey may not reflect the design I’m stitching, but they all reflect me.

About Janet M Perry
Janet Perry is the Internet's leading authority on needlepoint. She designs, teaches and writes, getting raves from her fans for her innovative techniques, extensive knowledge and generous teaching style. A leading writer of stitch guides, she blogs here and lives on an island in the northeast corner of the SF Bay with her family
Leave a Reply